Admins
Information for admins.
Overview
This section describes how the Admin team manages users and projects on the Oracle Cloud.
Feedback & Inquiries
To ask questions or suggest new features,
join the discussion
on Github. For issues with the Brainhack Cloud, please open a
new issue.
Funding
Thank you to Oracle for Research for providing Oracle Cloud credits and related
resources to support this project.

What is Oracle for Research?
“Oracle for Research supports academic, educational, and institutional researchers in all aspects of discovery. We’ve made it simple for them to host, store and analyze their data with our cloud infrastructure solutions. Our research customers are changing the world – and we’re proud to help them do it.”
License
CC BY License 4.0
1 - Creating new users
Creating new users
Overview
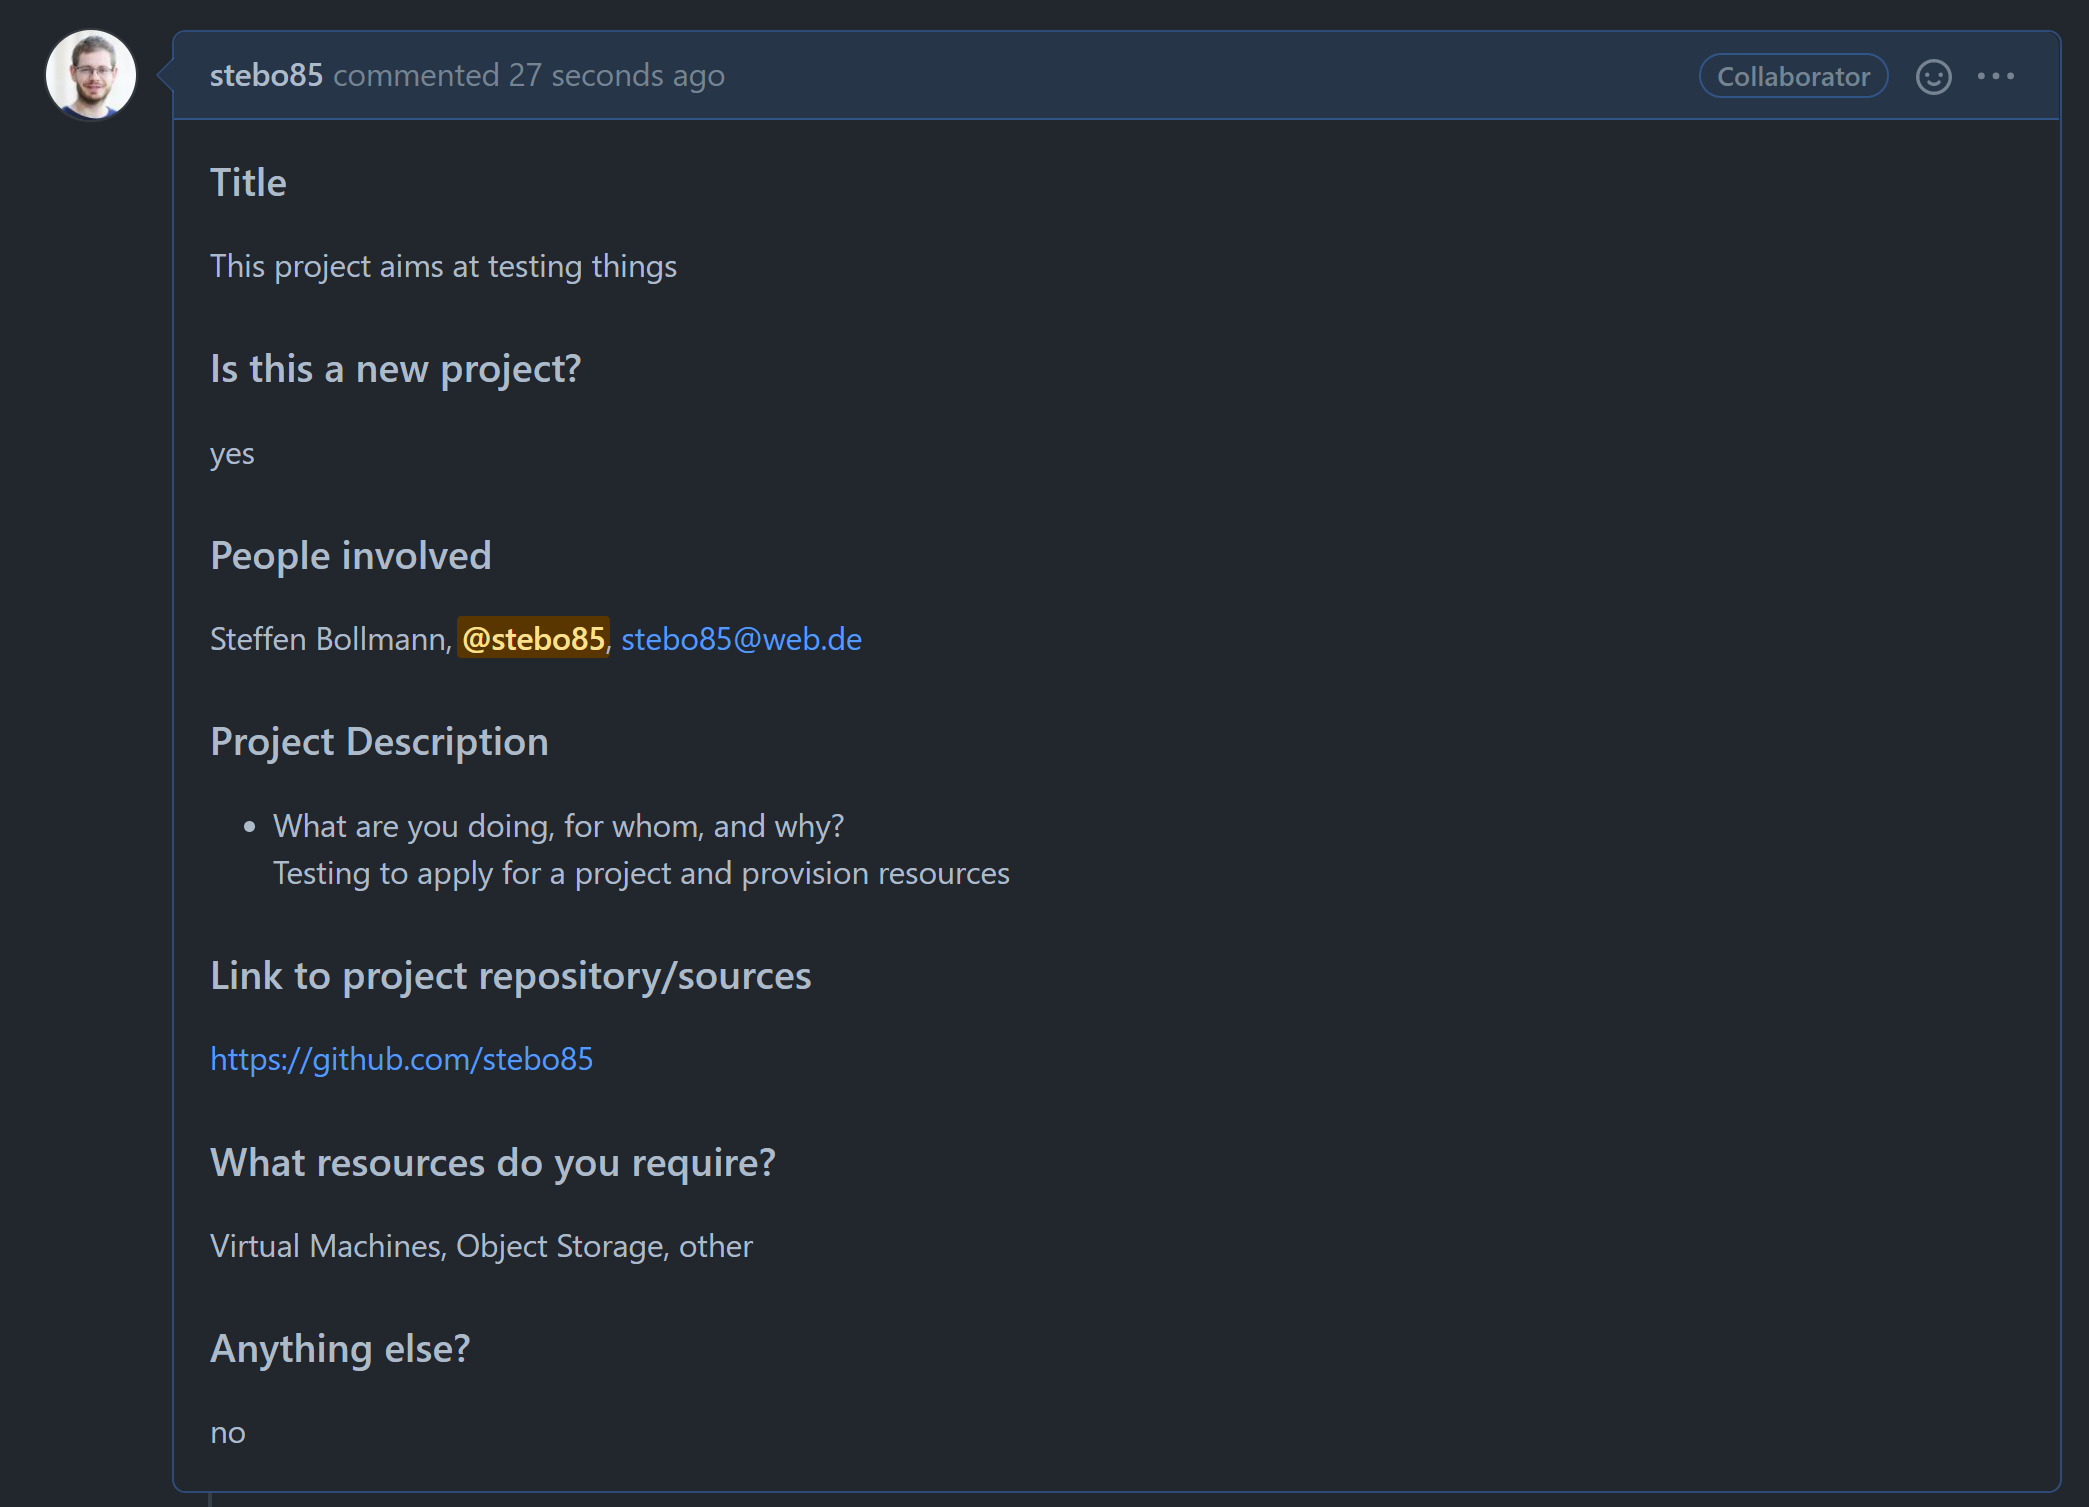
Once a new project is requested via the
Issue Template
one of the admins has to provision the project on the cloud.
Here is an example of such a request:
Creating a new user
Login to Oracle Cloud:
https://cloud.oracle.com/?region=eu-frankfurt-1&tenant=brainhack
Open the menu and search for users, then open Users in Identity

Then hit Create User.
Change the selection to IAM User, add the user name as firstname_lastname
and the same for description, and add an email.
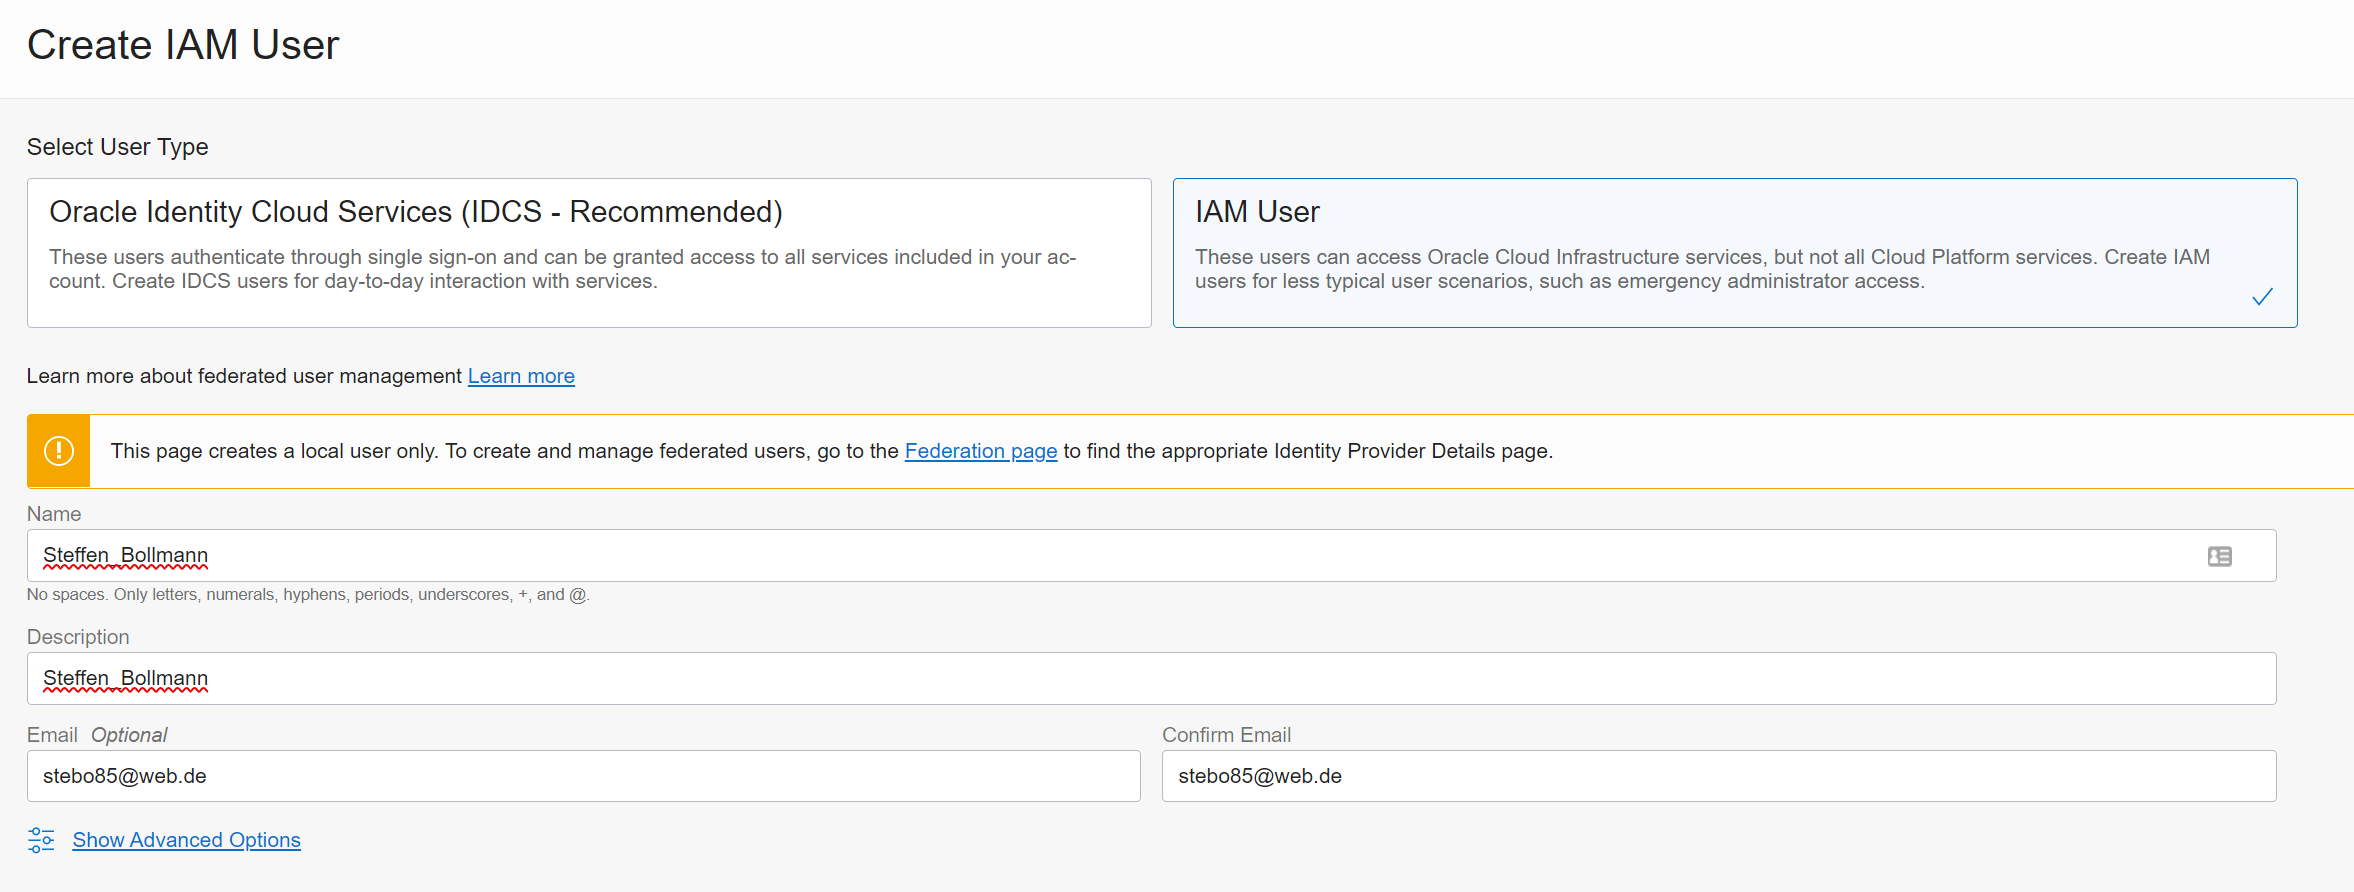
Hit create.
Now, generate a password for the user by Clicking Create/Reset Password

Copy this password and send it to the user you just created.
Here is an email template:
Dear

You should have gotten an email for the Oracle account verification a few minutes ago – check your spam folder if it’s not there 😊

Your temporary password is:


Your project compartment name is:


When logging in (https://cloud.oracle.com/?region=eu-frankfurt-1&tenant=brainhack) make sure to use “Direct Sign-In” (the SECOND sign-in option -> NOT SSO).

Let us know if you have any questions here: https://mattermost.brainhack.org/brainhack/channels/brainhack_cloud
The new user has to follow this procedure: User request.
Add the User to the group projects (This group has policies for giving users access to the cloudshell and the data science notebooks):

Repeat this procedure for every user in the project.
Create Project Group
Go back to Identity and click Create Group
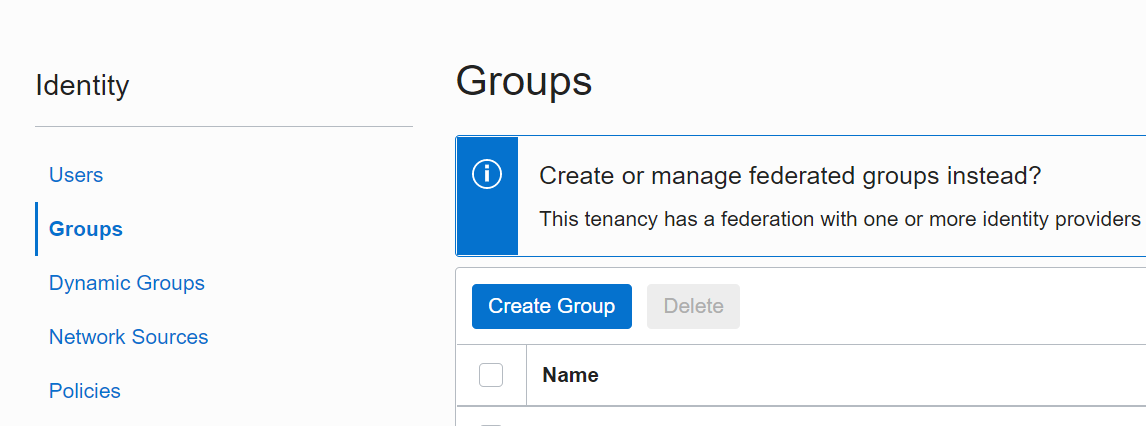
Give the group a name that represents the project (no spaces!) - as a Description
put the link to the Github issue.

Then add the User(s) to the group.

Create Project Compartment
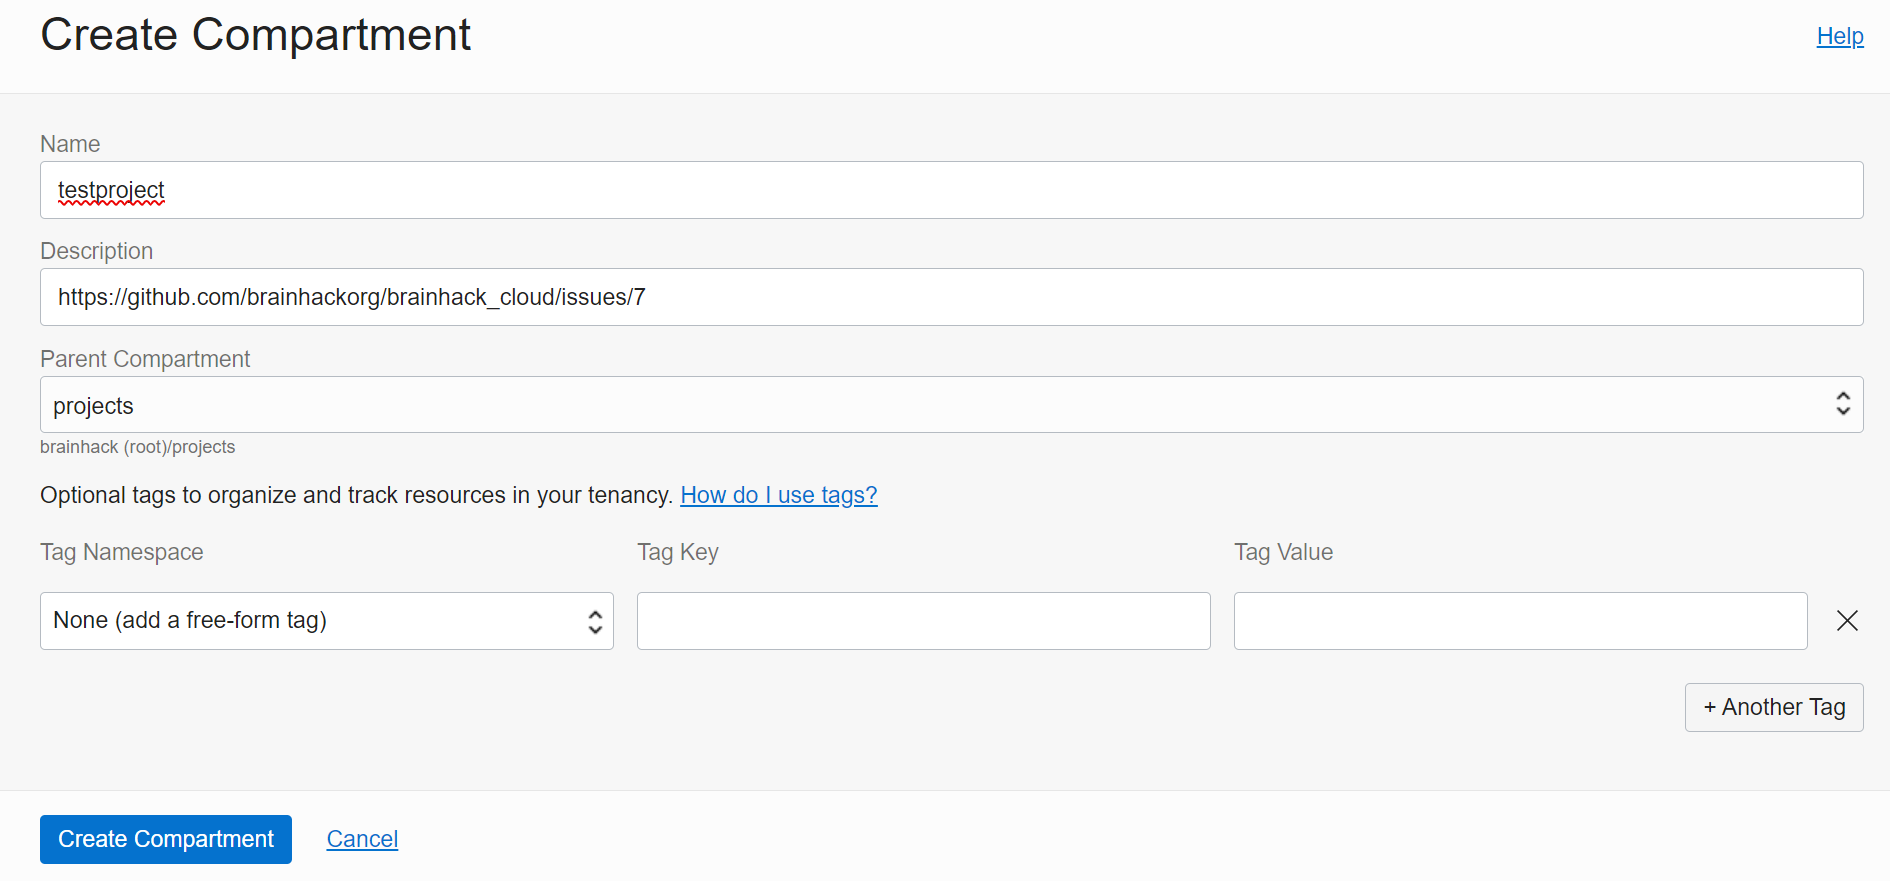
Go back to Identity and head to Compartments and click Create Compartment.
Name it like the group just created and add the Github issue link as
the description. Parent compartment is projects a sub-compartment under the main compartment brainhack (root).
Create Policy for group and compartment
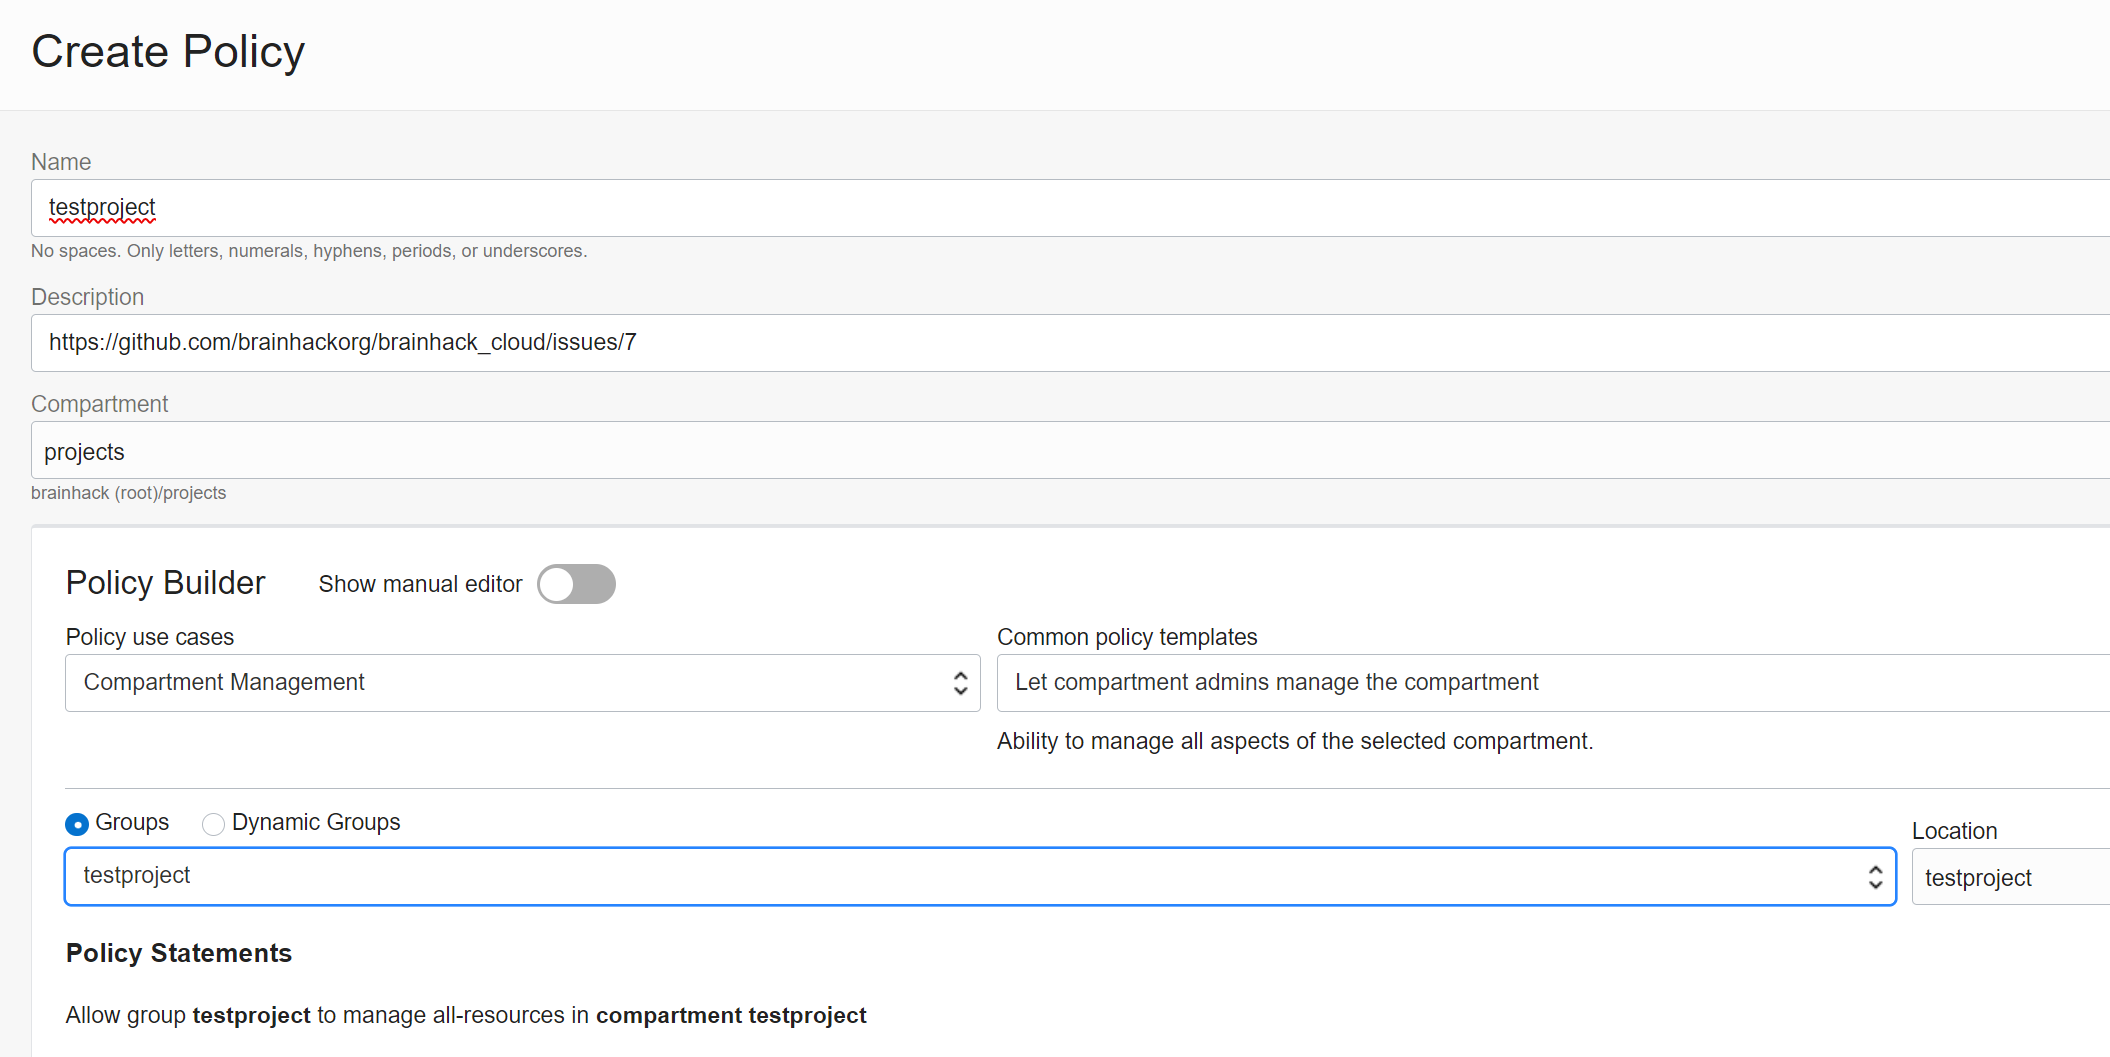
Go back to Identity and click on Policies. Click Create Policy. Name the
policy like the group and compartment just created. The description is the Github
issue link. You can either use the policy builder or switch to manual. The
resulting policy needs to be
Allow group REPLACEWITHGROUPNAME to manage all-resources in compartment REPALCEWITHCOMPARTMENTNAME. Make sure that this policies is at the project level and not in the brainhack (root) compartment:
Create a Budget for compartment
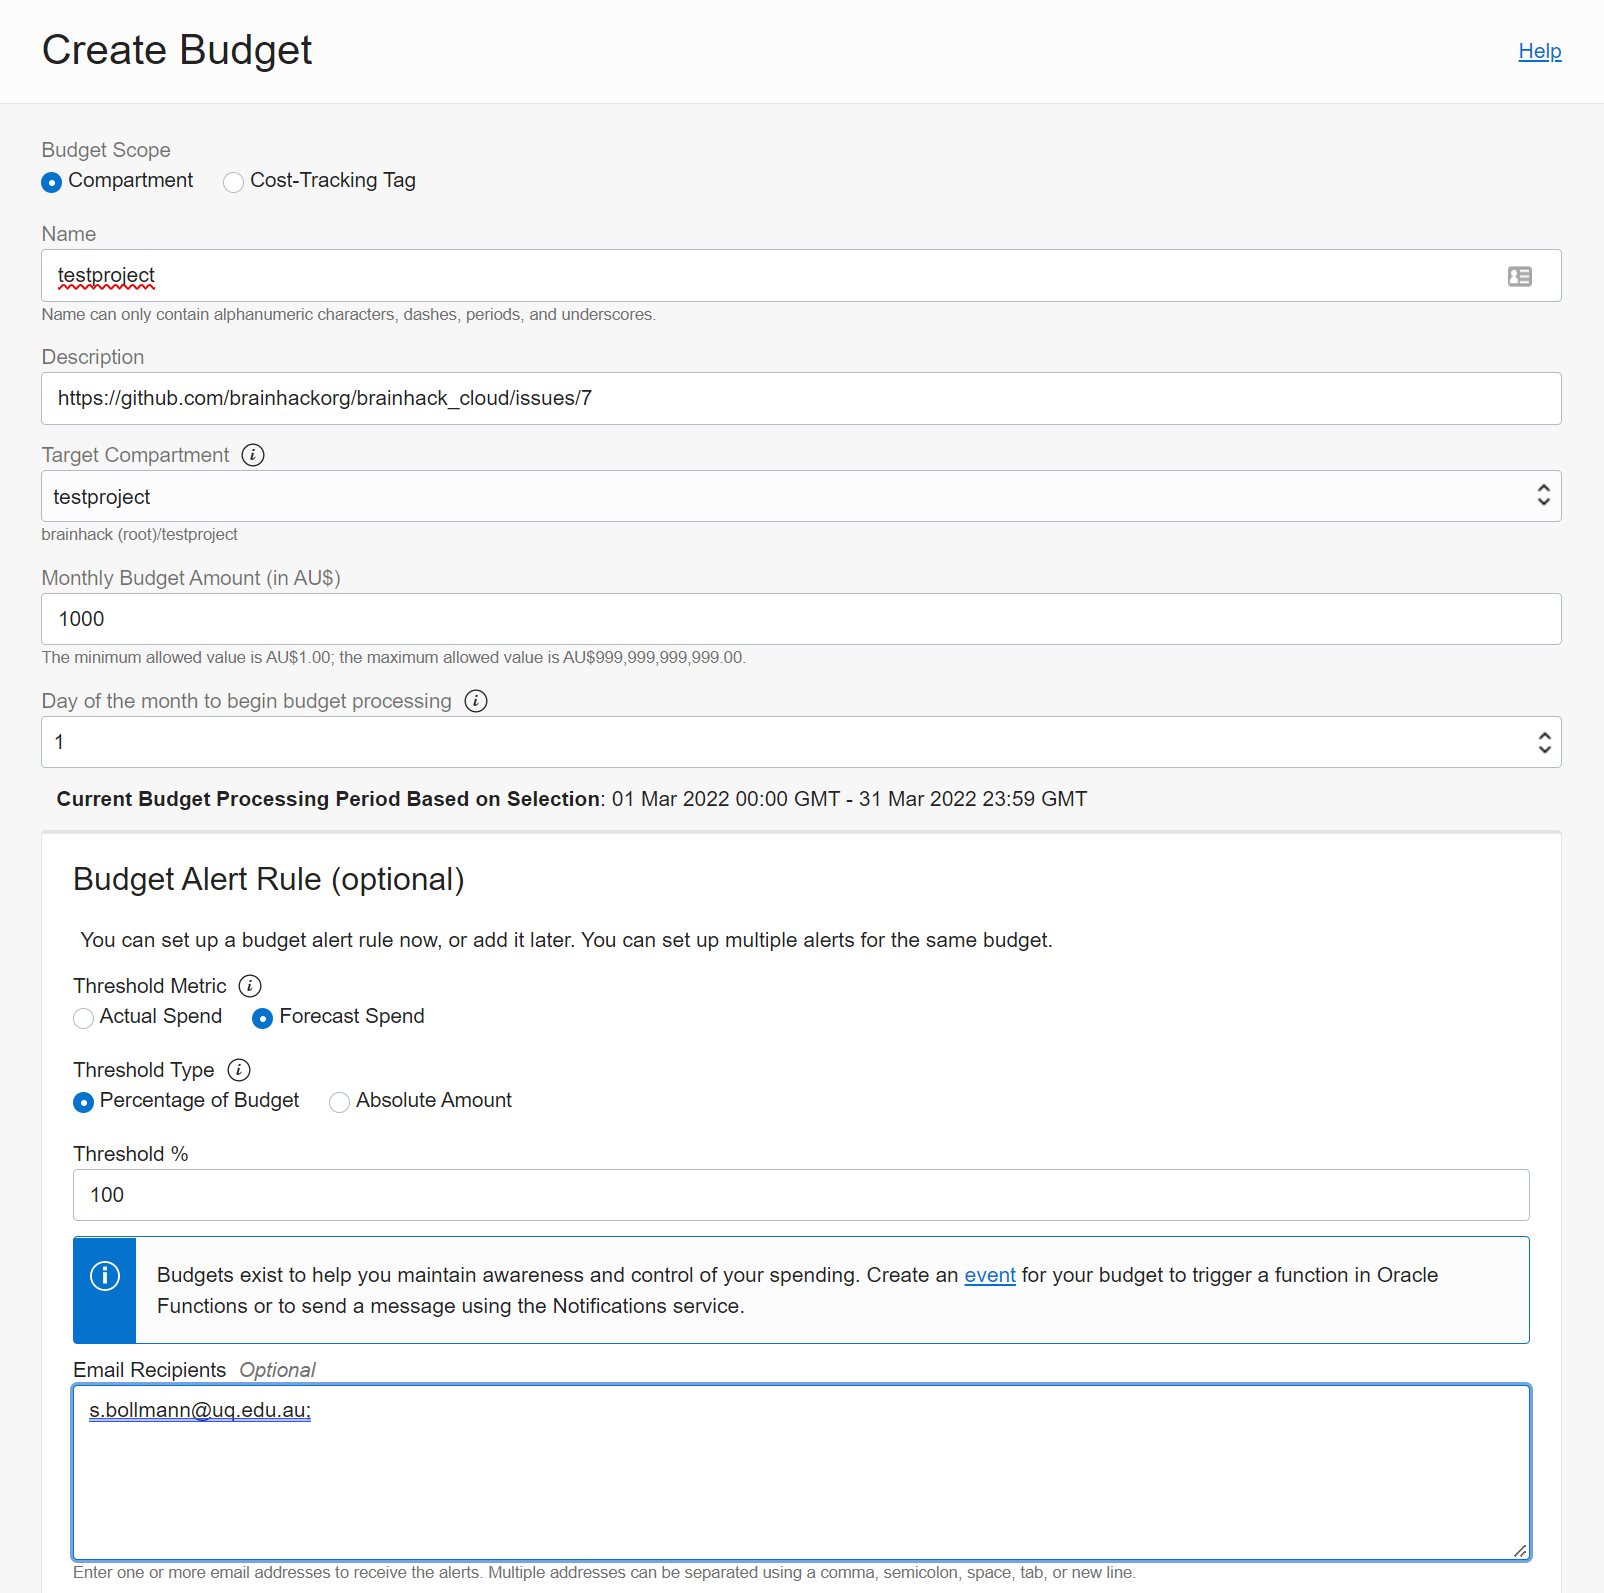
Budgets help us to control and monitor costs. For every compartment, we need a
budget with someone being alerted when things go crazy:
Go to Budgets under Cost Management and click Create Budget. Add the
project details and add your email to the alert list.
2 - Setting up policies
This is about Oracle cloud policies.
Overview
Access permissions are controlled via Policies. If something is not working,
it’s usually a missing policy. One important thing to note is that Policies can
ONLY be applied to Groups, NOT to the Users!
Policy for Cloud Shell access
By default, a new user cannot open a Cloud Shell. To provide every user with
this permission, we created a group called “cloudshell-access” and we add every
user to this group. The group then has a Policy that allows opening a cloud
shell: allow group cloudshell-access to use cloud-shell in tenancy
Policies for Object Storage Lifecycle management
To enable lifecycle management the local services need a policy to do this. I configured it for every possible region a user would choose:
Allow service objectstorage-eu-frankfurt-1 to manage object-family in compartment projects
Allow service objectstorage-ap-sydney-1 to manage object-family in compartment projects
Allow service objectstorage-ap-melbourne-1 to manage object-family in compartment projects
Allow service objectstorage-sa-saopaulo-1 to manage object-family in compartment projects
Allow service objectstorage-sa-vinhedo-1 to manage object-family in compartment projects
Allow service objectstorage-ca-montreal-1 to manage object-family in compartment projects
Allow service objectstorage-ca-toronto-1 to manage object-family in compartment projects
Allow service objectstorage-sa-santiago-1 to manage object-family in compartment projects
Allow service objectstorage-eu-marseille-1 to manage object-family in compartment projects
Allow service objectstorage-ap-hyderabad-1 to manage object-family in compartment projects
Allow service objectstorage-ap-mumbai-1 to manage object-family in compartment projects
Allow service objectstorage-il-jerusalem-1 to manage object-family in compartment projects
Allow service objectstorage-eu-milan-1 to manage object-family in compartment projects
Allow service objectstorage-ap-osaka-1 to manage object-family in compartment projects
Allow service objectstorage-ap-tokyo-1 to manage object-family in compartment projects
Allow service objectstorage-eu-amsterdam-1 to manage object-family in compartment projects
Allow service objectstorage-me-jeddah-1 to manage object-family in compartment projects
Allow service objectstorage-ap-singapore-1 to manage object-family in compartment projects
Allow service objectstorage-af-johannesburg-1 to manage object-family in compartment projects
Allow service objectstorage-ap-seoul-1 to manage object-family in compartment projects
Allow service objectstorage-ap-chuncheon-1 to manage object-family in compartment projects
Allow service objectstorage-eu-stockholm-1 to manage object-family in compartment projects
Allow service objectstorage-eu-zurich-1 to manage object-family in compartment projects
Allow service objectstorage-me-abudhabi-1 to manage object-family in compartment projects
Allow service objectstorage-me-dubai-1 to manage object-family in compartment projects
Allow service objectstorage-uk-london-1 to manage object-family in compartment projects
Allow service objectstorage-uk-cardiff-1 to manage object-family in compartment projects
Allow service objectstorage-us-ashburn-1 to manage object-family in compartment projects
Allow service objectstorage-us-phoenix-1 to manage object-family in compartment projects
Allow service objectstorage-us-sanjose-1 to manage object-family in compartment projects
Policies for HPC
allow service compute_management to use tag-namespace in tenancy
allow service compute_management to manage compute-management-family in tenancy
allow service compute_management to read app-catalog-listing in tenancy
Allow dynamic-group instance_principal to read app-catalog-listing in tenancy
Allow dynamic-group instance_principal to use tag-namespace in tenancy
Allow dynamic-group instance_principal to manage all-resources in compartment projects
3 - Resources
How resources work on the Oracle Cloud
By default, every tenancy has strict resource limits. These make sure that the right resources are available in the data centers where they are requested. An overview of which resources are available where can be found here:
https://www.oracle.com/cloud/data-regions/#northamerica
5 - Creating new admins
Creating new admins
Overview
To increase the security of our cloud tenancy an admin cannot create or remove other admins. This is the instruction for the admin-administrator to create new admin accounts:
Create a new admin
Admins need to use a “federated account” to login into the cloud instead of “local accounts”.
Go to Federation in Identity

Click on OracleIdentityCloudService and then Create User
append _admin to the Username (firstname_lastname) of the new user and add the user to the Group OCI_Administrators
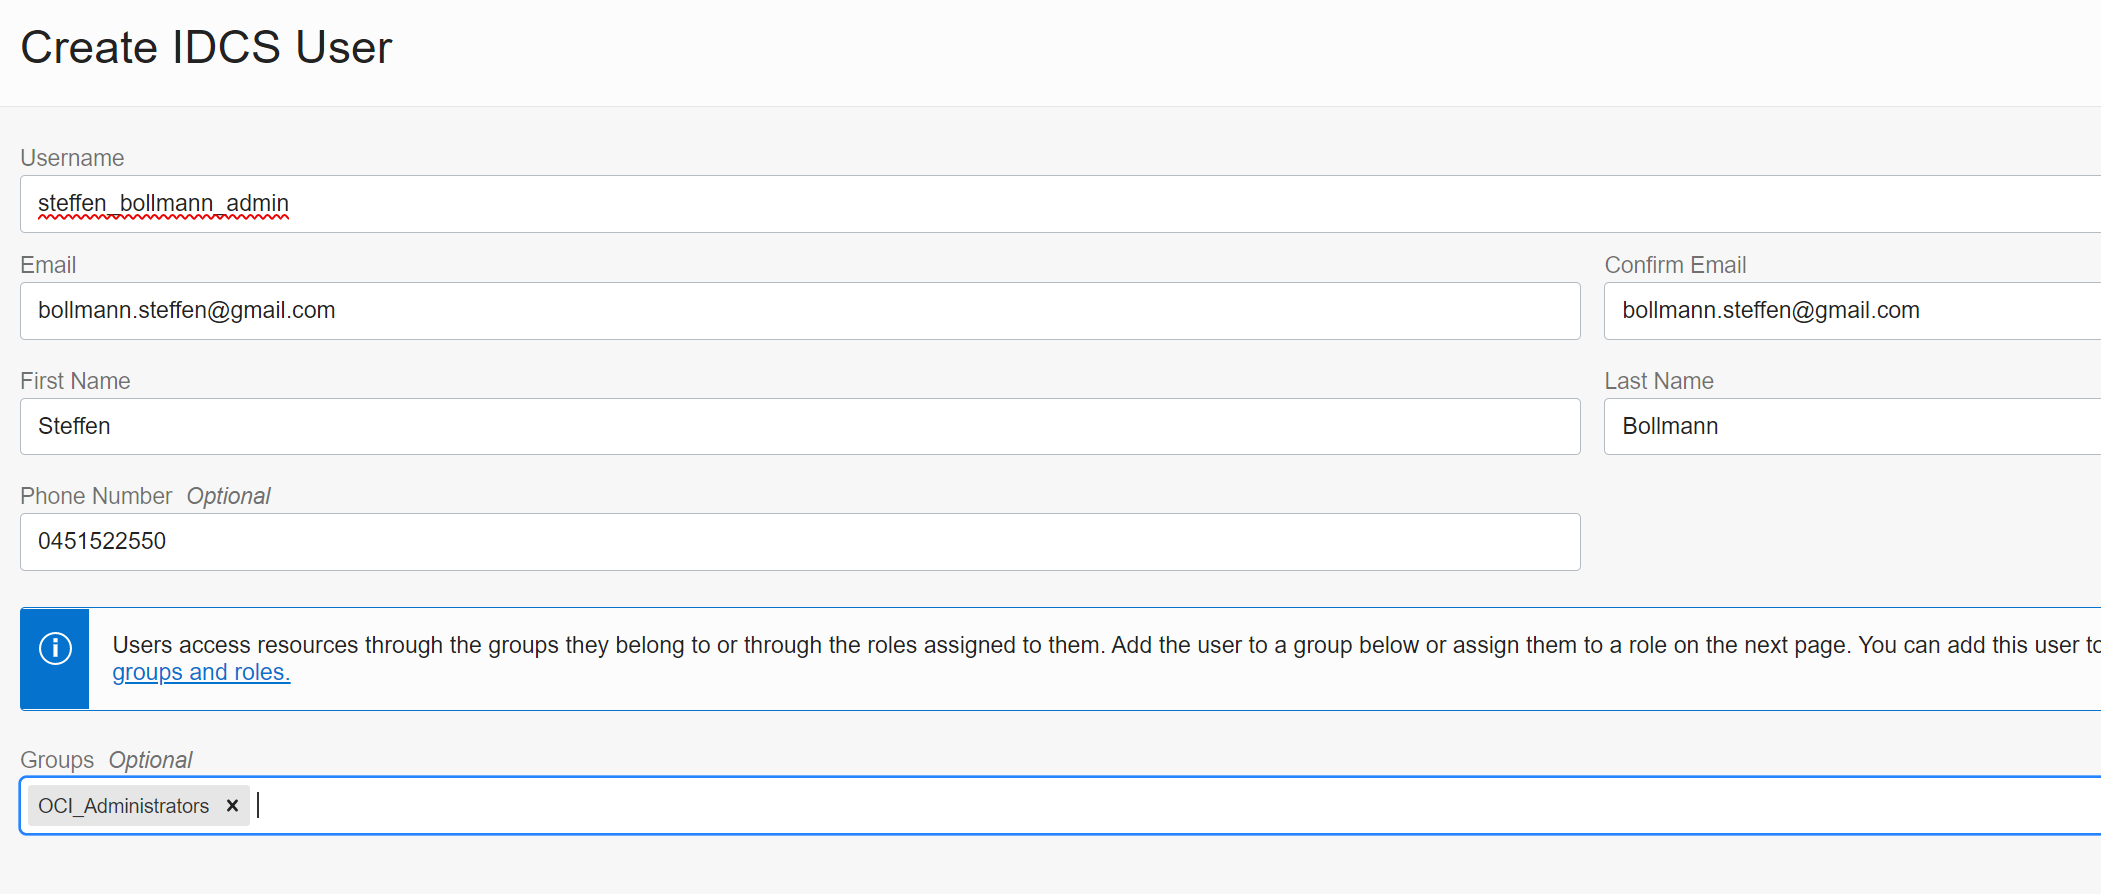
Warning: DO NOT ADD THE USER TO THE GROUP IDCS_Administrators - otherwise this admin will be able to manage other admin accounts.
You don’t have to assign any Roles to the user, so on the next screen click on Close.
The new admin will receive an email like this:
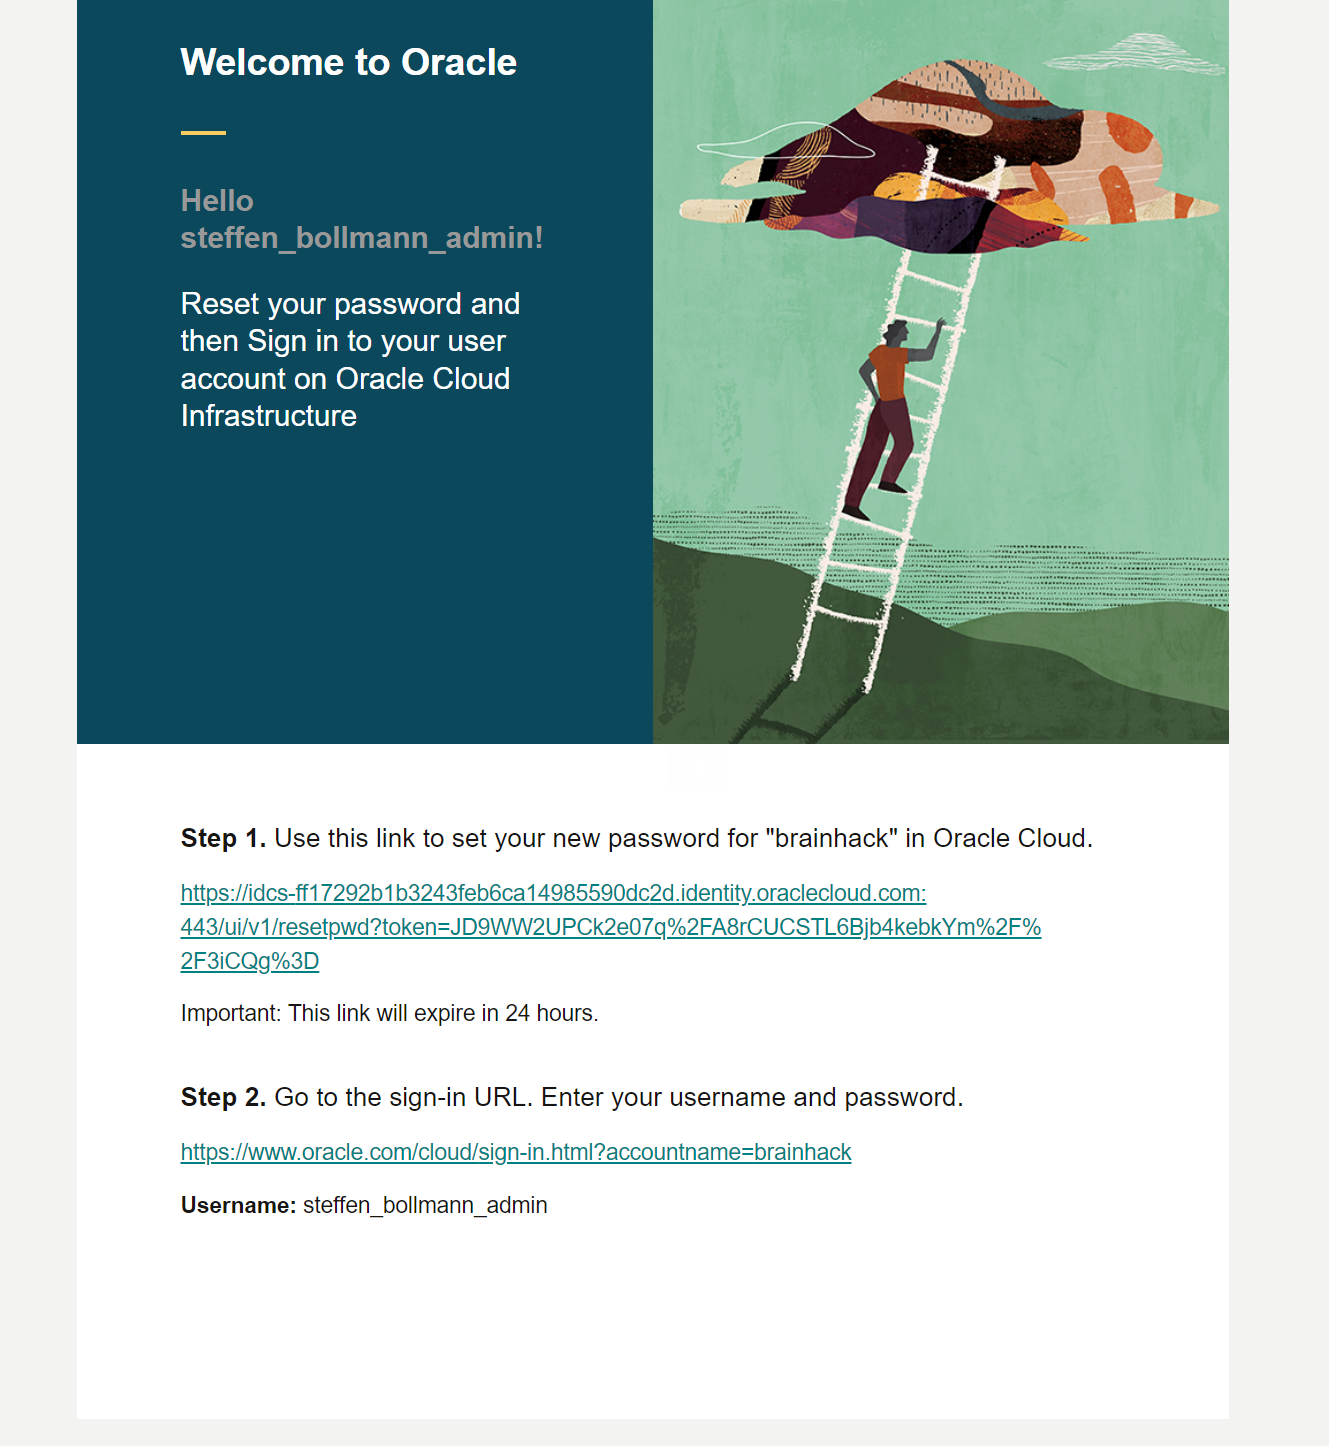
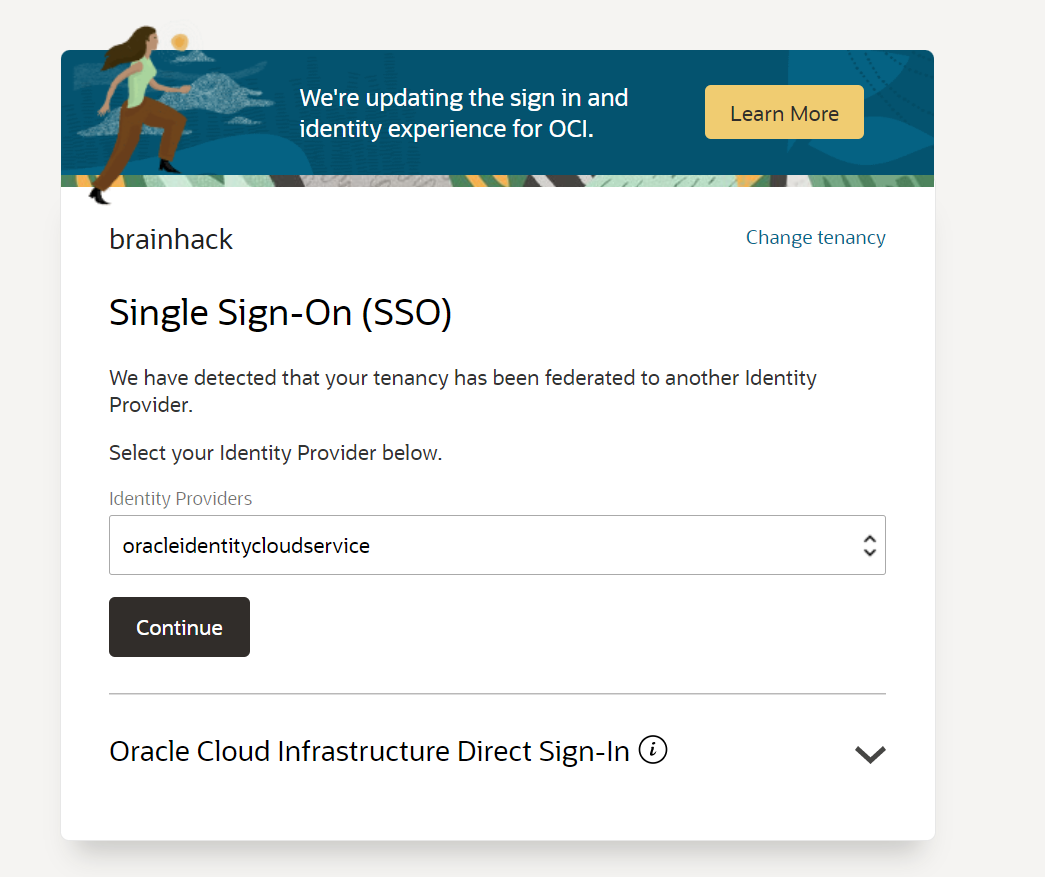
and after activating the account everything is ready to go and the new admin needs to sign on via federated accounts Single Sign On:
6 - Datascience setup
How to set up the datascience environments (only needs to be done once).
Step 1) Create VCN and Subnets
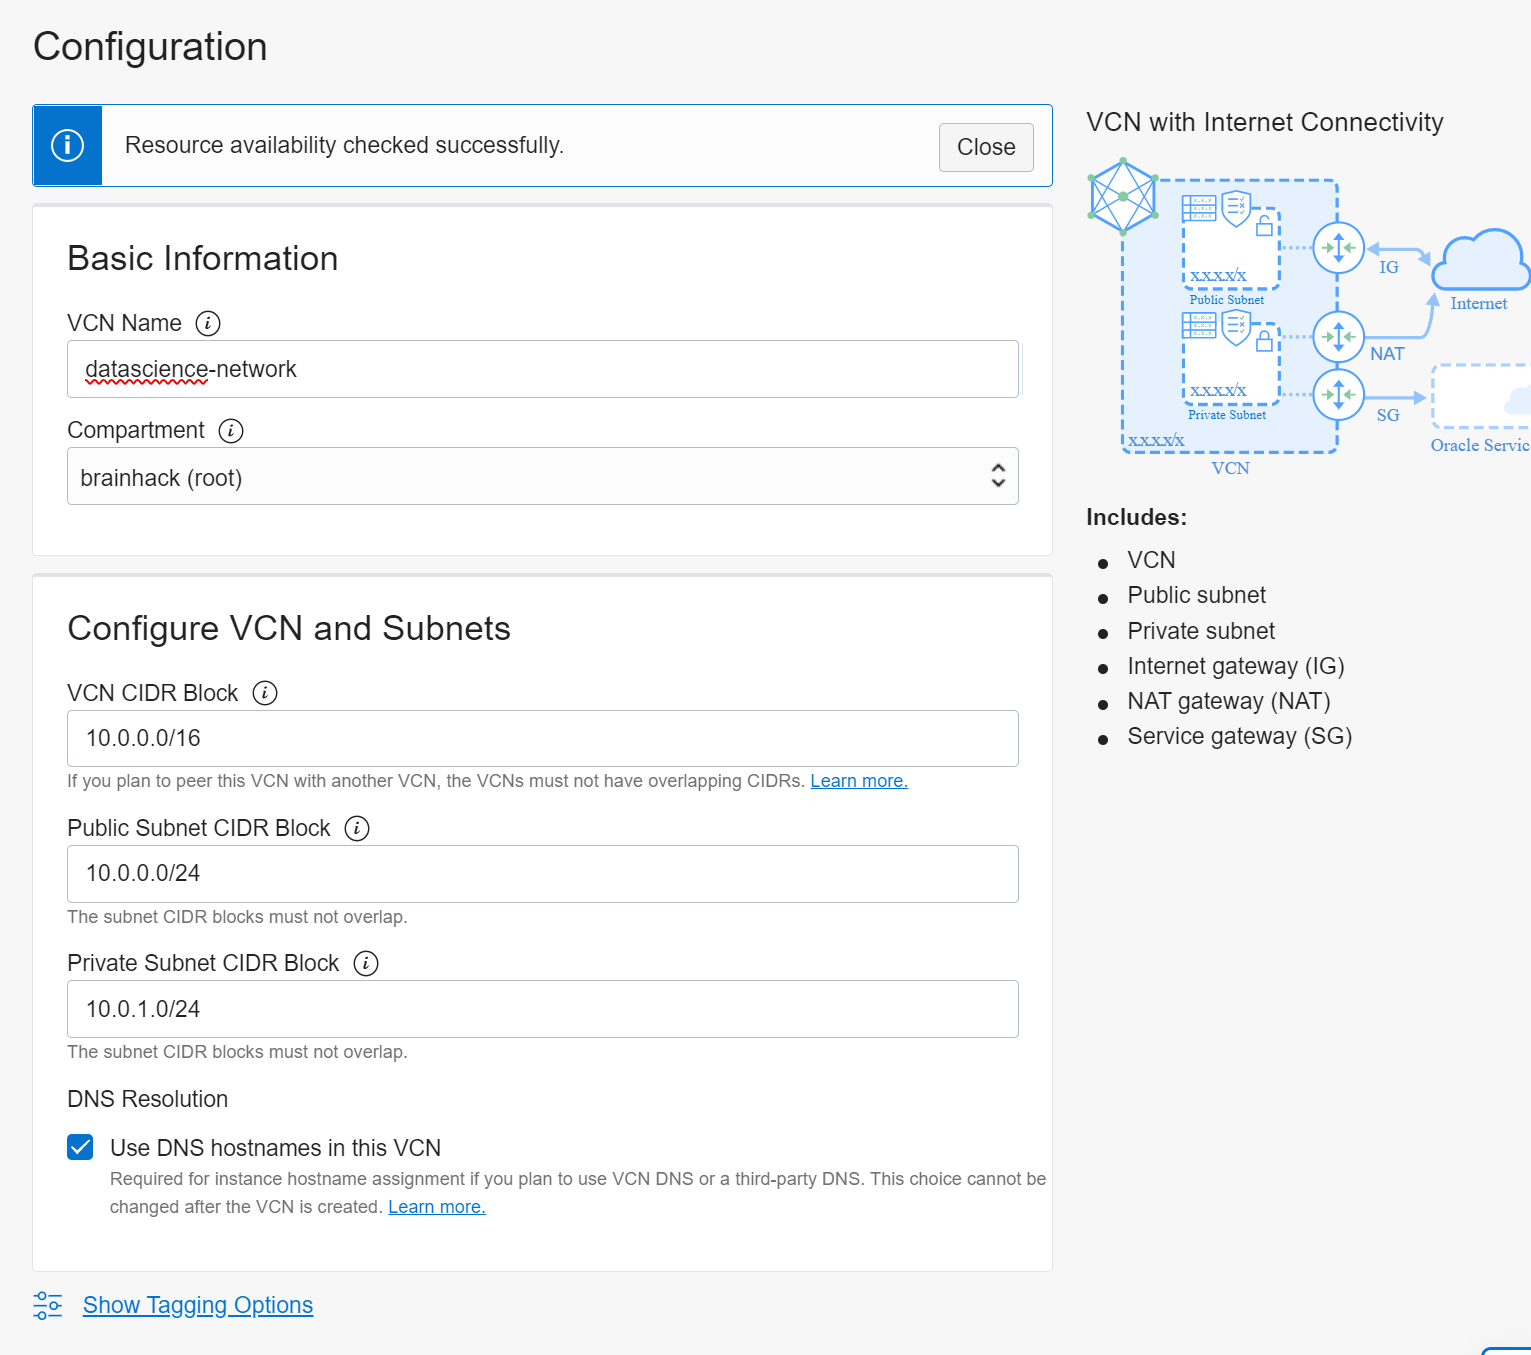
Create a VCN and subnets using Virtual Cloud Networks > Start VCN Wizard > VCN with Internet Connectivity option.
The Networking Quickstart option automatically creates the necessary private subnet with a NAT gateway.
Step 2) Create a Dynamic Group
Create a dynamic group with the following matching rule:
ALL { resource.type = ‘datasciencenotebooksession’ }
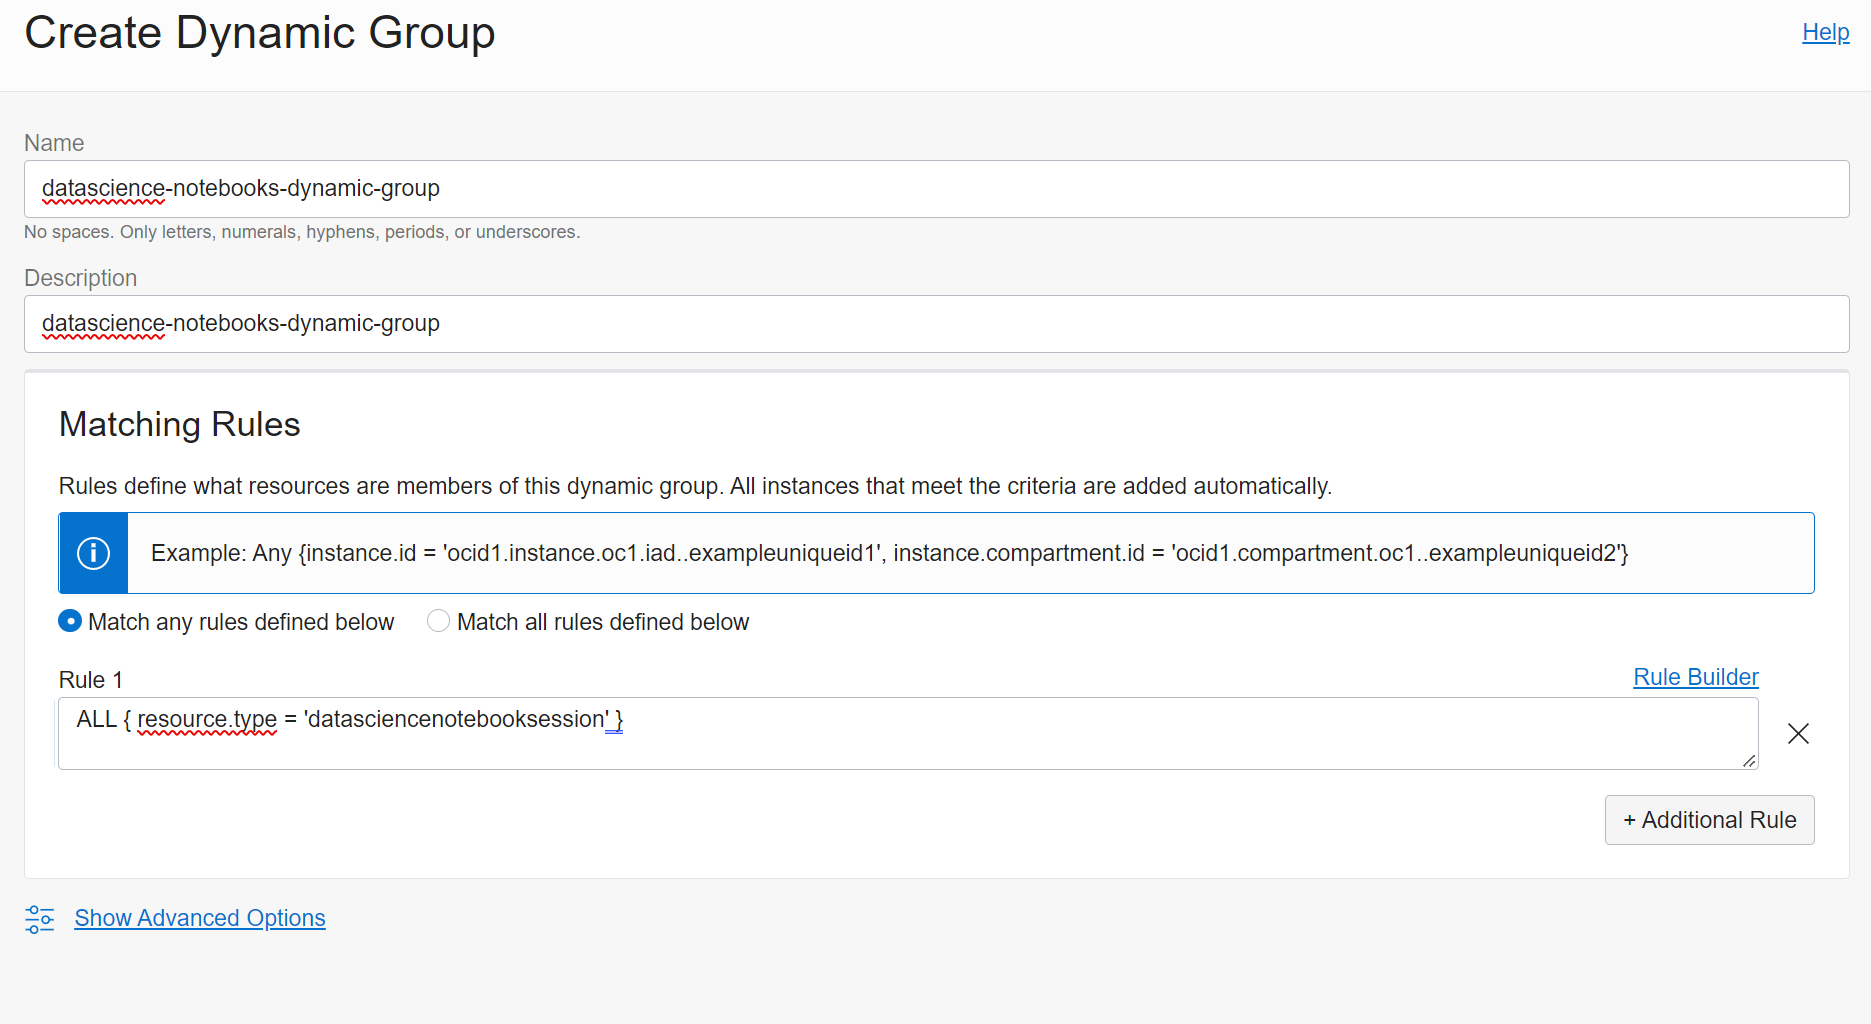
created as “datascience-notebooks-dynamic-group”
Step 3) Create Policies
Create a policy in the root compartment with the following statements:
3.1 Service Policies
allow service datascience to use virtual-network-family in tenancy
-> created in root compartment as “datascience”
3.2 Non-Administrator User Policies
allow group data-scientists to use virtual-network-family in tenancy
allow group data-scientists to manage data-science-family in tenancy
where data-scientists represents the name of your user group -> setup as “projects” group
3.3 Dynamic Group Policies
allow dynamic-group dynamic-group to manage data-science-family in tenancy
where dynamic-group represents the name of your dynamic group
-> created as datascience-dynamic-group-policy in the root compartment


