Virtual machines
Overview
Running a Virtual machine on the Oracle cloud is the basis for many other things.
Setup
Make sure you selected the geographic region where you would like to create the resource.
Here I create it in the Home Region, Frankfurt.
Notice
Ideally, you want the region to be as close to you (or your users) as possible to have low latencies. So, you should change the default from Frankfurt to another region from the list.
Head to Compute -> Instances
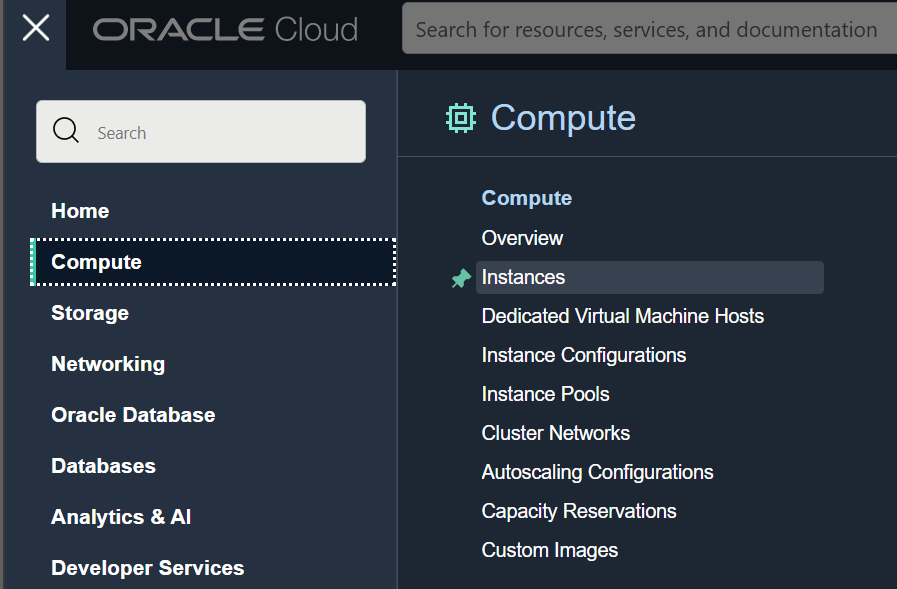
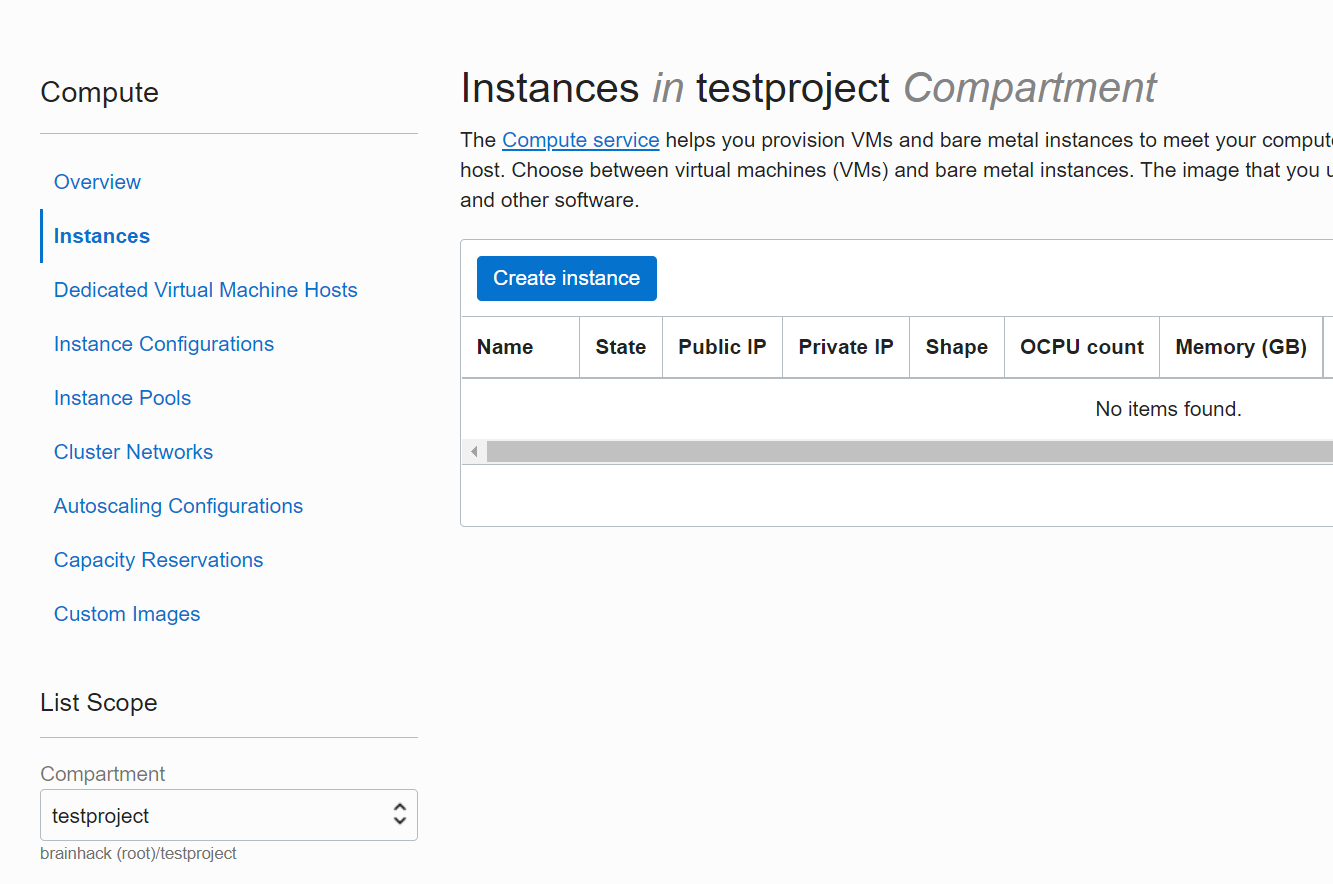
Check that you selected YOUR project compartment (testproject, is the example
here - but you need to change this!) and click Create Instance
Selecting an image and a shape
You can name the instance and then select an Image (Oracle Linux is a good starting point as it has many tools installed that make it work very well on the Cloud) and select a Shape.
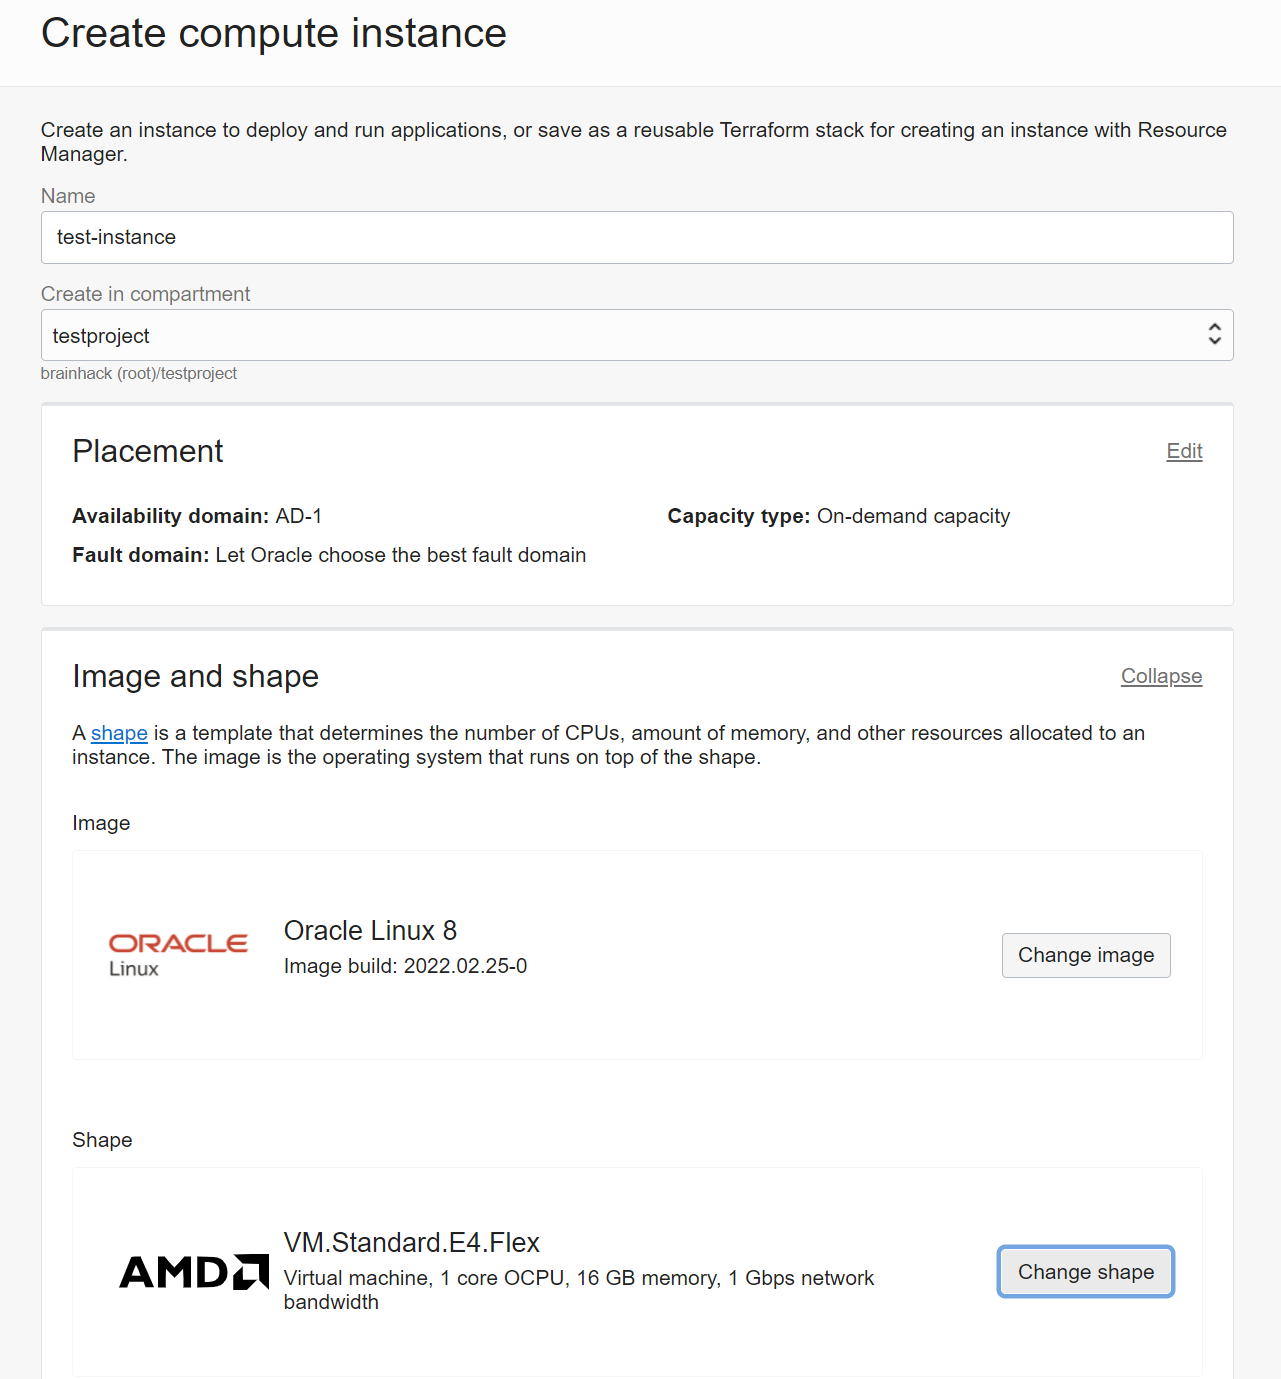
VM.Standard.E4.Flex is a good starting point.
Warning
The default is Ampere and this is an ARM architecture, so most of your applications wouldn’t work out of the box - it is therefore important to change the default Shape to an x86 architecture, like the VM.Standard.E4.Flex.
The network setup has sensible defaults to start with
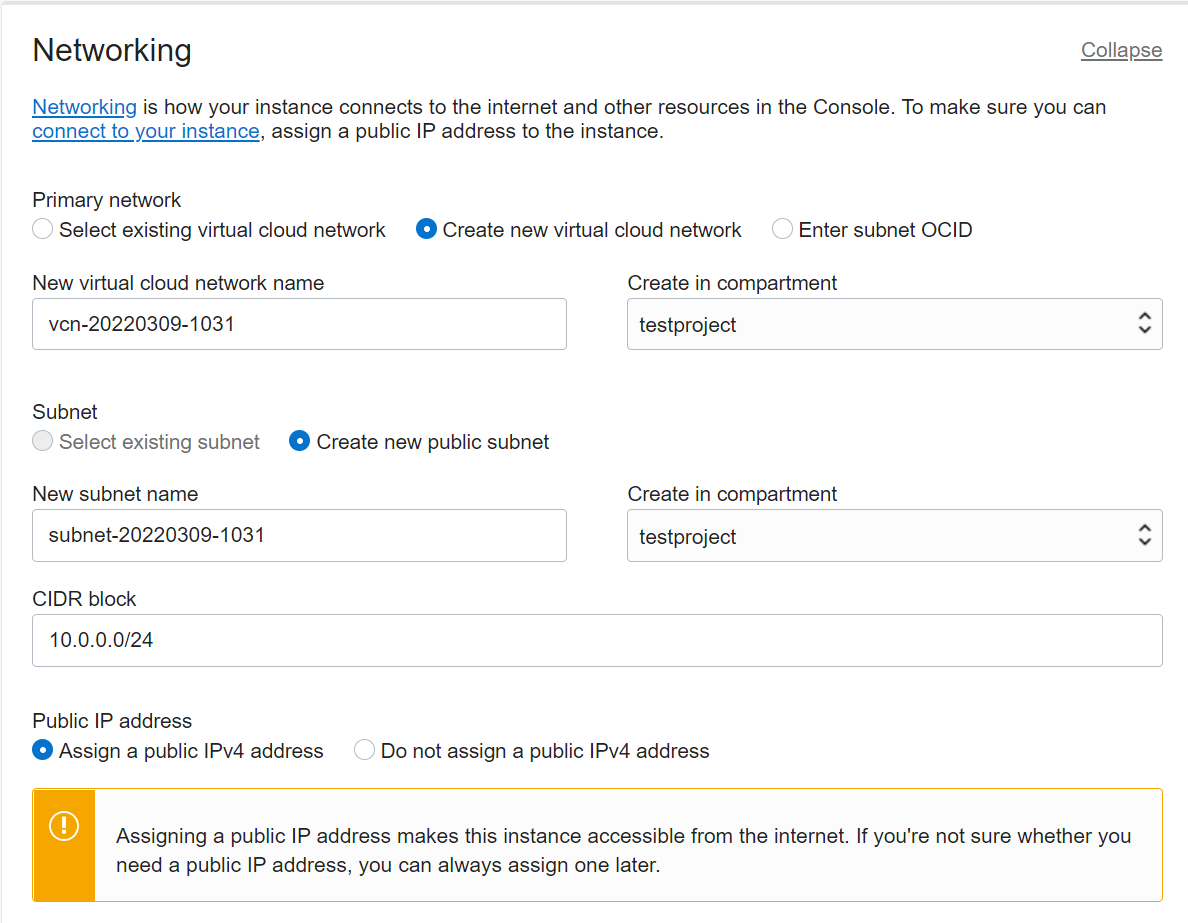
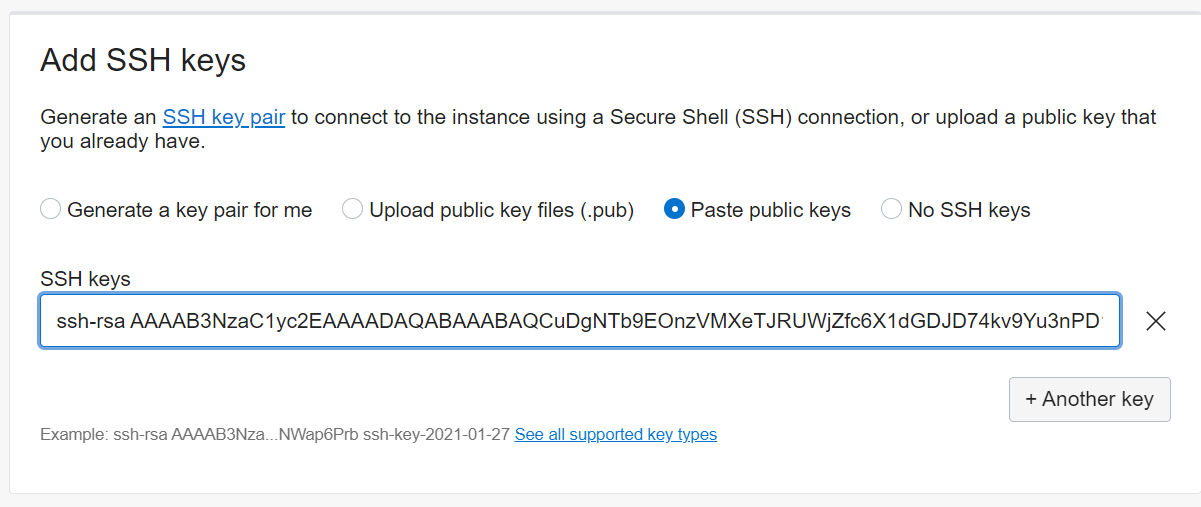
You can either paste a public key you already have to access to this VM or create a key by choosing the option Generate a key pair for me under Add SSH Keys section.
Connect to the VM using the Oracle key pair
If you would like to use the key pairs the instance creation procedure generates, you can use the following steps based on your operating system.
First download and install an SSH client to your machine (for Linux and Mac, use OpenSSH and for Windows use Putty).
From the Instances dashboard, find your VM you would like to connect with ssh, and click to find and note its Public IP address.
If you are using Linux or Mac, run the following command on your local terminal to change the file permission on the private key file that you downloaded from the Oracle dashboard.
Warning
If you chose the optiongenerate a key pair for me you need to change the permission on the file after downloading - otherwise it will result in a Permission denied (publickey,gssapi-keyex,gssapi-with-mic) error triggered by Load key "*.key": bad permissionschmod 600 /path/privateKeyFileName
Then Run the below command to access the VM via SSH by pasting the IP address of the VM you created.
ssh opc@IPADDRESS -i /path/privateKeyFileName
If you are using Windows use the PuTTY Key Gen generator to generate a PuTTY Private Key file (.ppk).
Open the PuTTY Keygen Generator.
Load the downloaded private key file to the PuTTY Generator.
Enter a phasephrase if you prefer to secure the private key to the Key passpphrase and Confirm passphrase fields, otherwise leave these as empty.
Then click Save private key to save the private key file it produces.
Go to your local command line (PowerShell) and connect to your VM with the below command
putty -i C:\Path\privateKey.ppk opc@IPADDRESS.
Now you are good to go!
Create your own public key
If you don’t have a public key yet - this is how you can create one (for example in the cloudshell)
Open the Cloud Shell (this will take a few seconds the first time)

Run ssh-keygen to create private/public key pairs (the defaults are sensible,
so just hit Enter a few times)
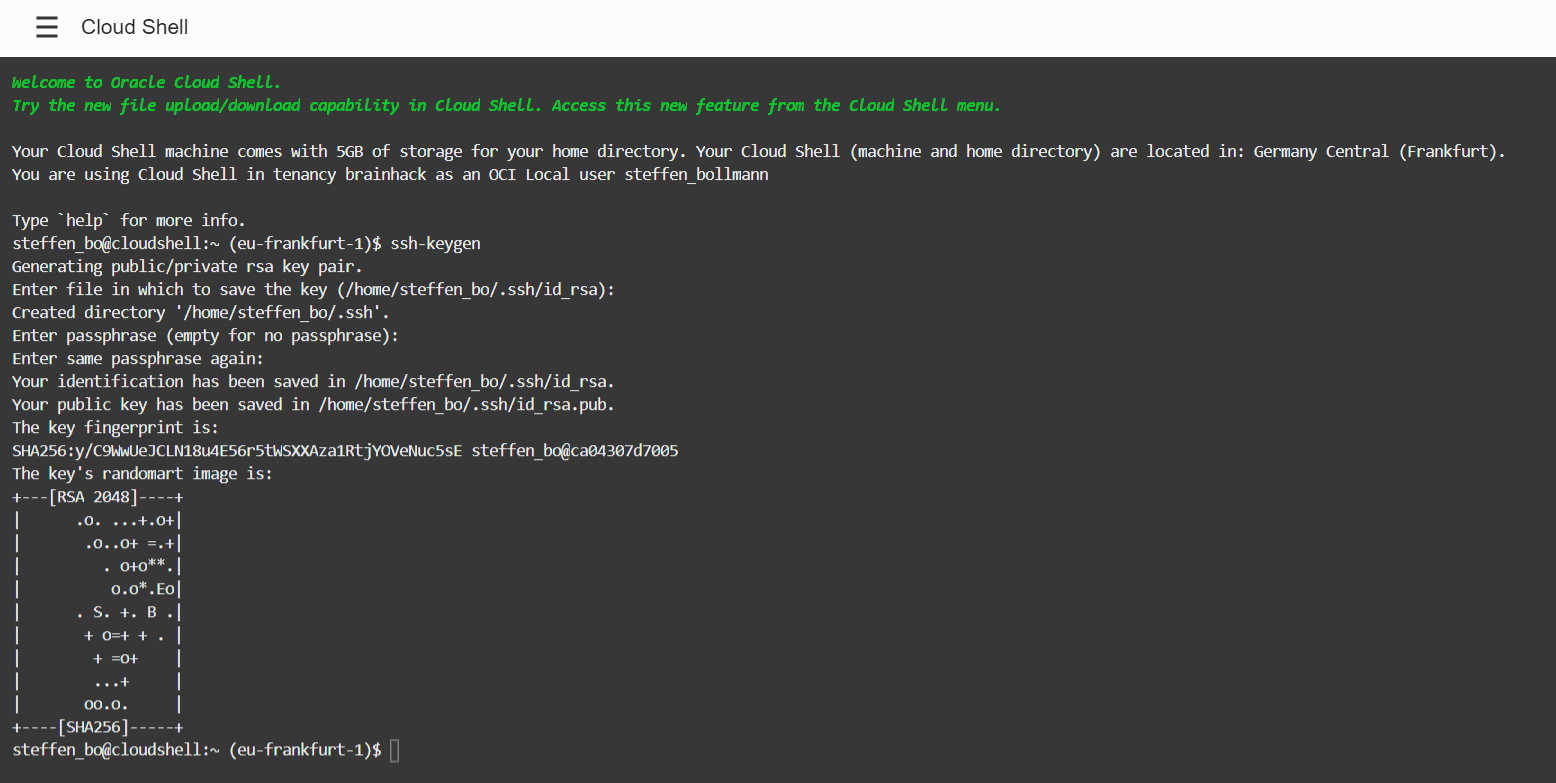
Now print the public key with cat ~/.ssh/id_rsa.pub and copy it to the
clipboard.

Warning
Never share the private key with anyone, which is inid_rsa!Paste it in the Add SSH keys section
Disk size
You can specify a custom boot volume size, but you can also increase this later (described below).
Note: it’s not possible to shrink a volume! Only increasing the size is possible, so start small and increase when needed. Increasing the size is even possible while the instance is running and will not interrupt your work :)
The rest of the defaults are sensible.

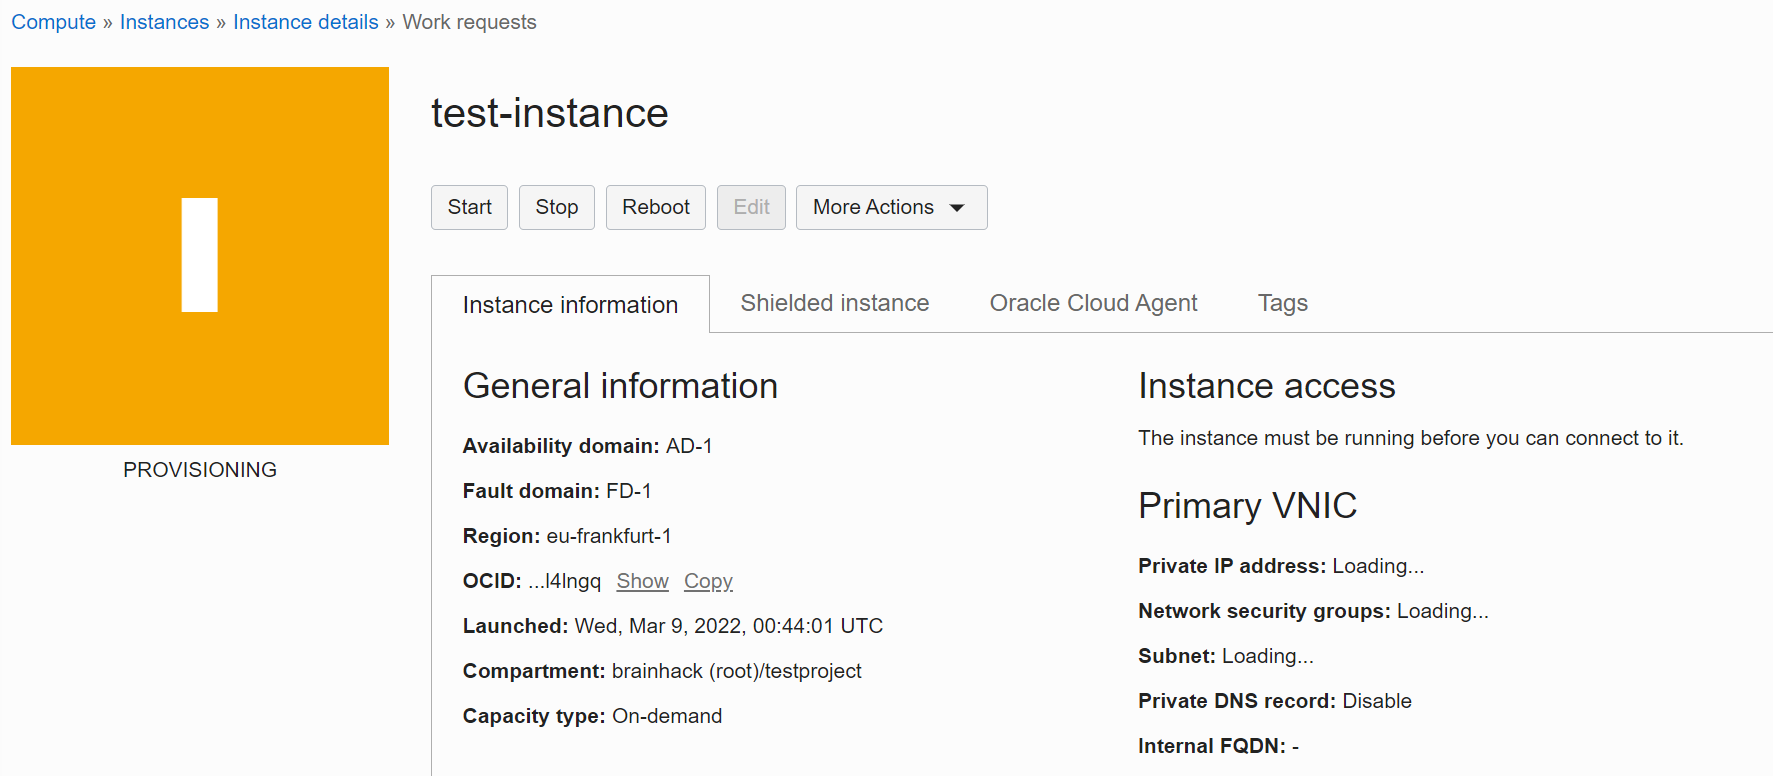
Create the VM
This will now create the machine.
Connect to Instance
You can now use an SSH client on your computer to connect to the Instance, or the cloudshell.
You find the connection details in.
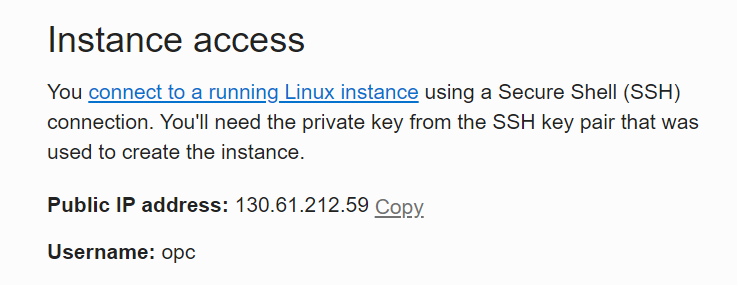
So in this case you would connect to your instance by typing.
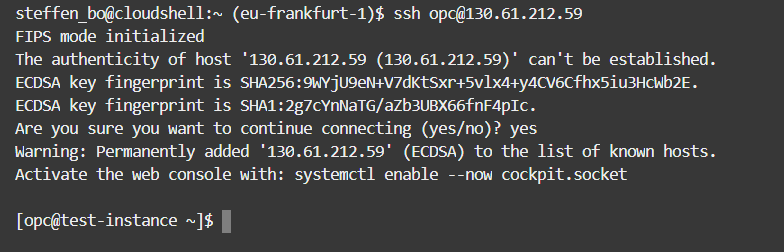
ssh opc@130.61.212.59
If you are planning on running web services on the instance (like a jupyter notebook service) - then it’s easiest to connect to the instance via a port forwarding and then opening the web service in your local browser at localhost:portnumber.
ssh -L portnumber:127.0.0.1:portnumber opc@130.61.212.59
Accept the fingerprint and you should be connected.
Keeping a process running even when disconnecting:
For this you can use tmux: install tmux with:
sudo yum install tmux
then start a tmux session with:
tmux
then run whatever process or tool you need
you can disconnect from tmux by hitting CTRL-B and then d. Then you can disconnect from your SSH session (and this also happens when for example your internet connection gets disconnected).
you can reconnect to the tmux session using:
tmux a
Expand disk
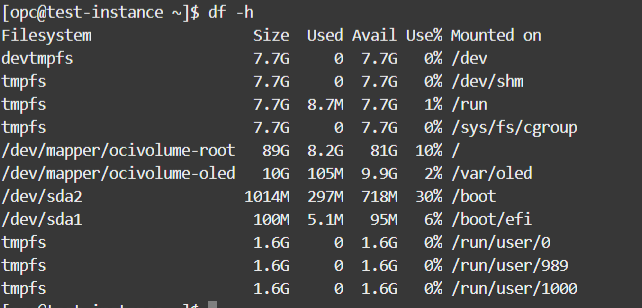
By default, the instance will not utilize the whole disk size!
You can check with df -h.

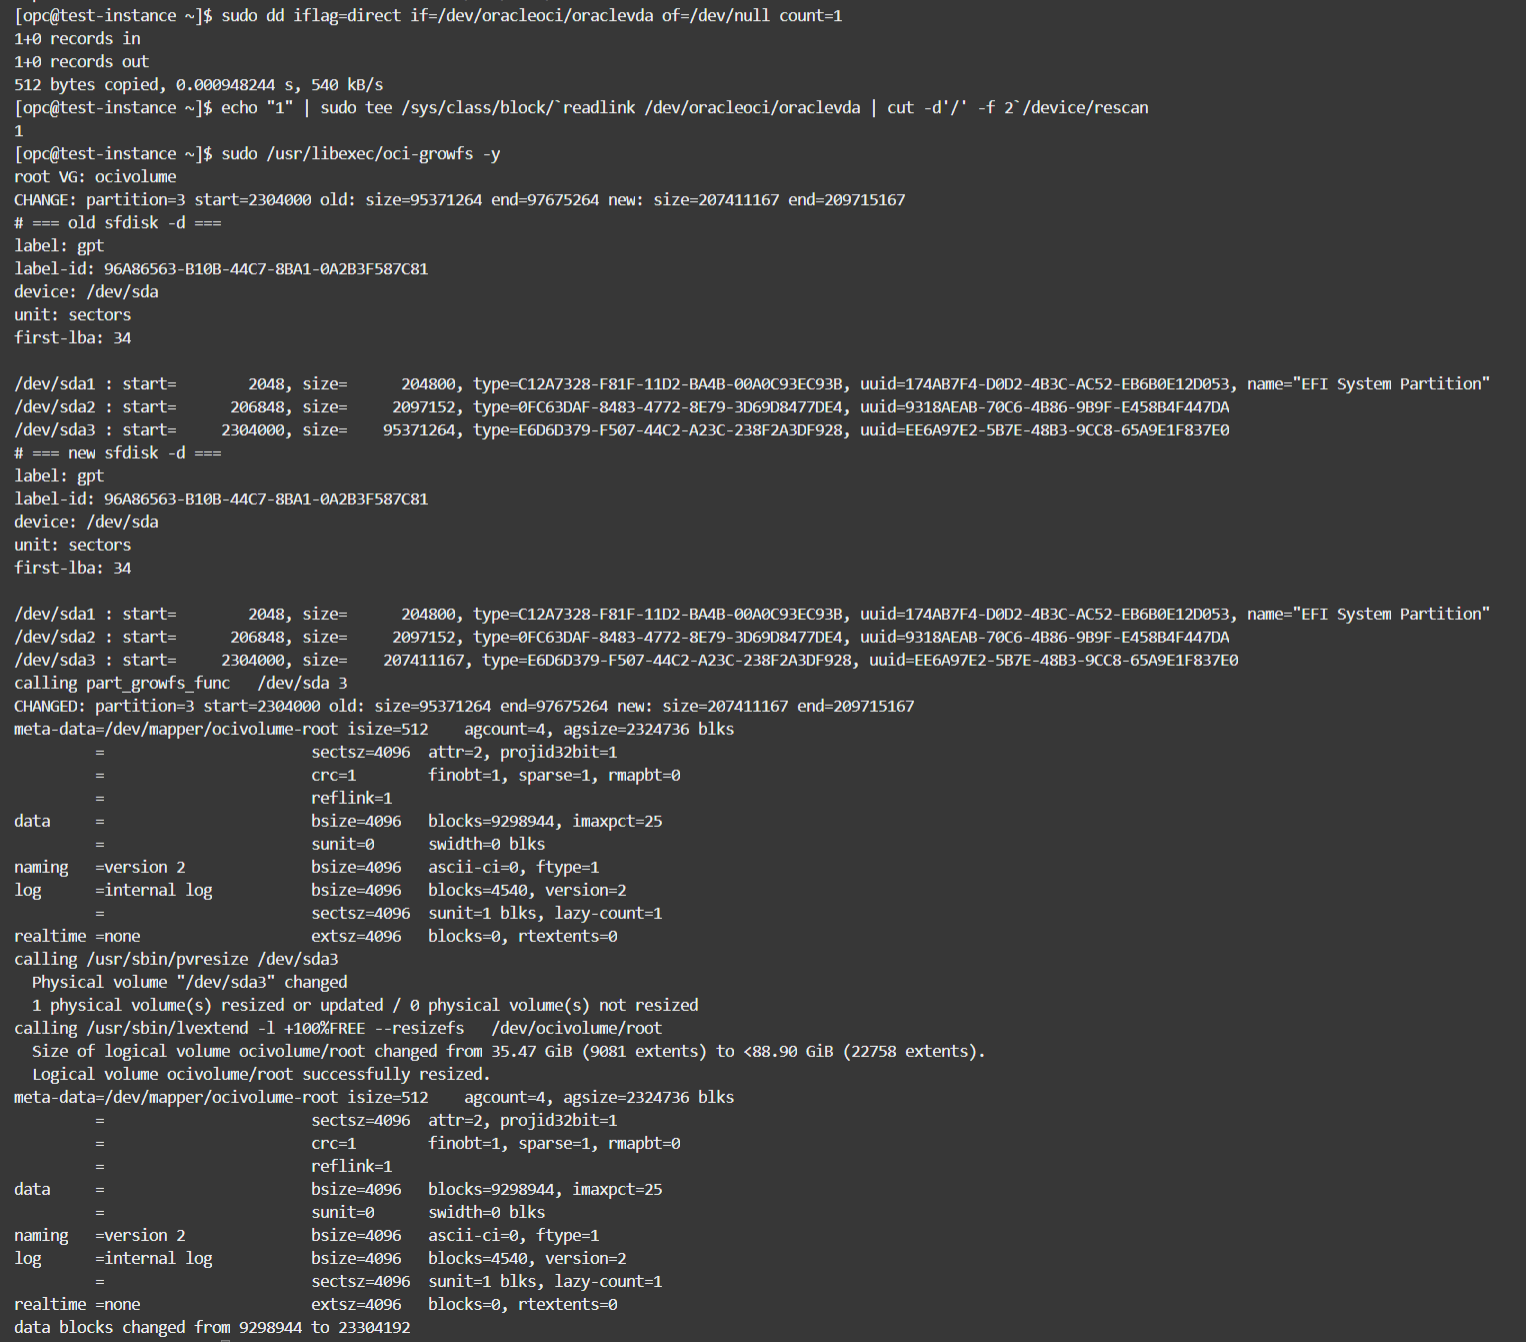
But it can expand the disk with the following commands.
sudo dd iflag=direct if=/dev/oracleoci/oraclevda of=/dev/null count=1
echo "1" | sudo tee /sys/class/block/`readlink /dev/oracleoci/oraclevda | cut -d'/' -f 2`/device/rescan
sudo /usr/libexec/oci-growfs -y
If you are not using an Oracle Linux image, then oci-growfs will not be installed. You can create the script manually by copying this:
#!/bin/bash

# oci-utils
#
# Copyright (c) 2018, 2020 Oracle and/or its affiliates. All rights reserved.
# Licensed under the Universal Permissive License v 1.0 as shown at http://oss.oracle.com/licenses/upl.

ASSUME_YES=0
ASSUME_NO=0

# Print usage message
usage()
{
cat <<EOF
Usage: $0 [OPTION]

Expand the root filesystem to its configured size.

Option:
  -y                           Assume "yes" for all questions.
  -n                           Assume "n" to all questions (used for preview).
  -h                           Print this message.

EOF

}

# Prompt for action confirmation
confirm()
{
    [ ${ASSUME_YES} -eq 1 ] && return 0
    [ ${ASSUME_NO} -eq 1 ] && return 1

    while true
    do
        # force use of a tty, if we are inside a 'read loop' already the prompt is never display and we loop forever
        read -p "Confirm? [y/n]" input < /dev/tty
        case ${input} in
            [yY][eE][sS]|[yY])
                return 0;;
            [nN][oO]|[nN])
                return 1;;
        esac
    done
}

part_growfs_preview(){
    if [ $# -ne 2 ]; then
        echo "Invalid disk or partition."
        exit 1
    fi

    growpart $1 $2 --dry-run
    return $?
}

part_growfs_func(){
    if [ $# -ne 2 ]; then
        echo "Invalid disk or partition."
        exit 1
    fi

    growpart $1 $2
    if [ $? -eq 0 ]
    then
        xfs_growfs /
    fi
    return $?
}

if [ "$EUID" -ne 0 ]; then
    echo "This script needs root privileges to execute."
    exit 1
fi

while [ "$#" -gt 0 ]; do
    case "$1" in
    -n|-N)
        ASSUME_NO=1
        break
        ;;
    -y|-Y)
        ASSUME_YES=1
        break
        ;;
    -h)
        usage
        exit 0
        ;;
    -* | *)
        echo "unknown option: $1" >&2;
        usage;
        exit 1
        ;;
    esac
done


# first get storage type used for root FS
_storage=`/usr/bin/findmnt --canonicalize --noheadings --output SOURCE /`
# expecting lvm or part,
/usr/bin/lsblk --noheadings -o TYPE,NAME $_storage | while read _type _sto
do
    case "${_type}" in
        part)
            part_growfs_preview /dev/${_sto//[0-9]/} ${_sto//[^0-9]/} || exit 1
            confirm
            if [ $? -eq 0 ]
            then
                part_growfs_func /dev/${_sto//[0-9]/} ${_sto//[^0-9]/}
                exit $?
            else
                exit 0
            fi
            ;;
        lvm)
            # 1. find LV and VG of the device
            #     we pipe to  awk  to strip away any leading space
            _root_vg=`/usr/sbin/lvs --noheadings --options vg_name --select lv_dm_path=$_storage | awk '{print $1}'`
            echo "root VG: ${_root_vg}"
            [ "${_root_vg}" == "" ] && echo "Cannot find root volume group." && exit 1

            # 2. find all PVs involve in the VG used for root
            for _pv in `/usr/sbin/pvs --noheadings --options pv_name --select vg_name=${_root_vg}`
            do
                # 3. find device of PVs
                _device=`/usr/sbin/pvs --noheadings --options devices --select pv_name=${_pv}`
                # device is suffixed with extne number like /dev/sda3(0) , just keep disk information parts
                _device=${_device//([0-9]*)/}
                # 3.1 extend the partittion
                part_growfs_preview ${_device//[0-9]/} ${_device//[^0-9]/} || exit 1
                confirm
                if [ $? -eq 0 ]
                then
                    echo "calling part_growfs_func ${_device//[0-9]/} ${_device//[^0-9]/}"
                    part_growfs_func ${_device//[0-9]/} ${_device//[^0-9]/}
                    [ $? != 0 ] && echo "Cannot extend physical volume disk partition." && exit 1
                else
                    exit 0
                fi
                # 3.1 extend the PV
                echo "calling /usr/sbin/pvresize ${_pv}"
                /usr/sbin/pvresize ${_pv}
                [ $? != 0 ] && echo "Cannot extend physical volume." && exit 1
            done
            # 4. extend the LV and the FS
            _lv_path=`/usr/sbin/lvs --noheadings --options lv_path --select lv_dm_path=$_storage`
            echo "calling /usr/sbin/lvextend -l +100%FREE --resizefs ${_lv_path}"
            /usr/sbin/lvextend -l +100%FREE --resizefs ${_lv_path}
            exit $?
    esac
done

exit $?
into /usr/libexec/oci-growfs by doing this:
sudo vi /usr/libexec/oci-growfs
# hit i to activate insert mode, then paste, then hit SHIFT-Z-Z to exit and save
sudo chmod a+x /usr/libexec/oci-growfs
then execute the expansion command:
sudo dd iflag=direct if=/dev/oracleoci/oraclevda of=/dev/null count=1
echo "1" | sudo tee /sys/class/block/`readlink /dev/oracleoci/oraclevda | cut -d'/' -f 2`/device/rescan
sudo /usr/libexec/oci-growfs -y
Now it’s using the full volume.
Increase disk size
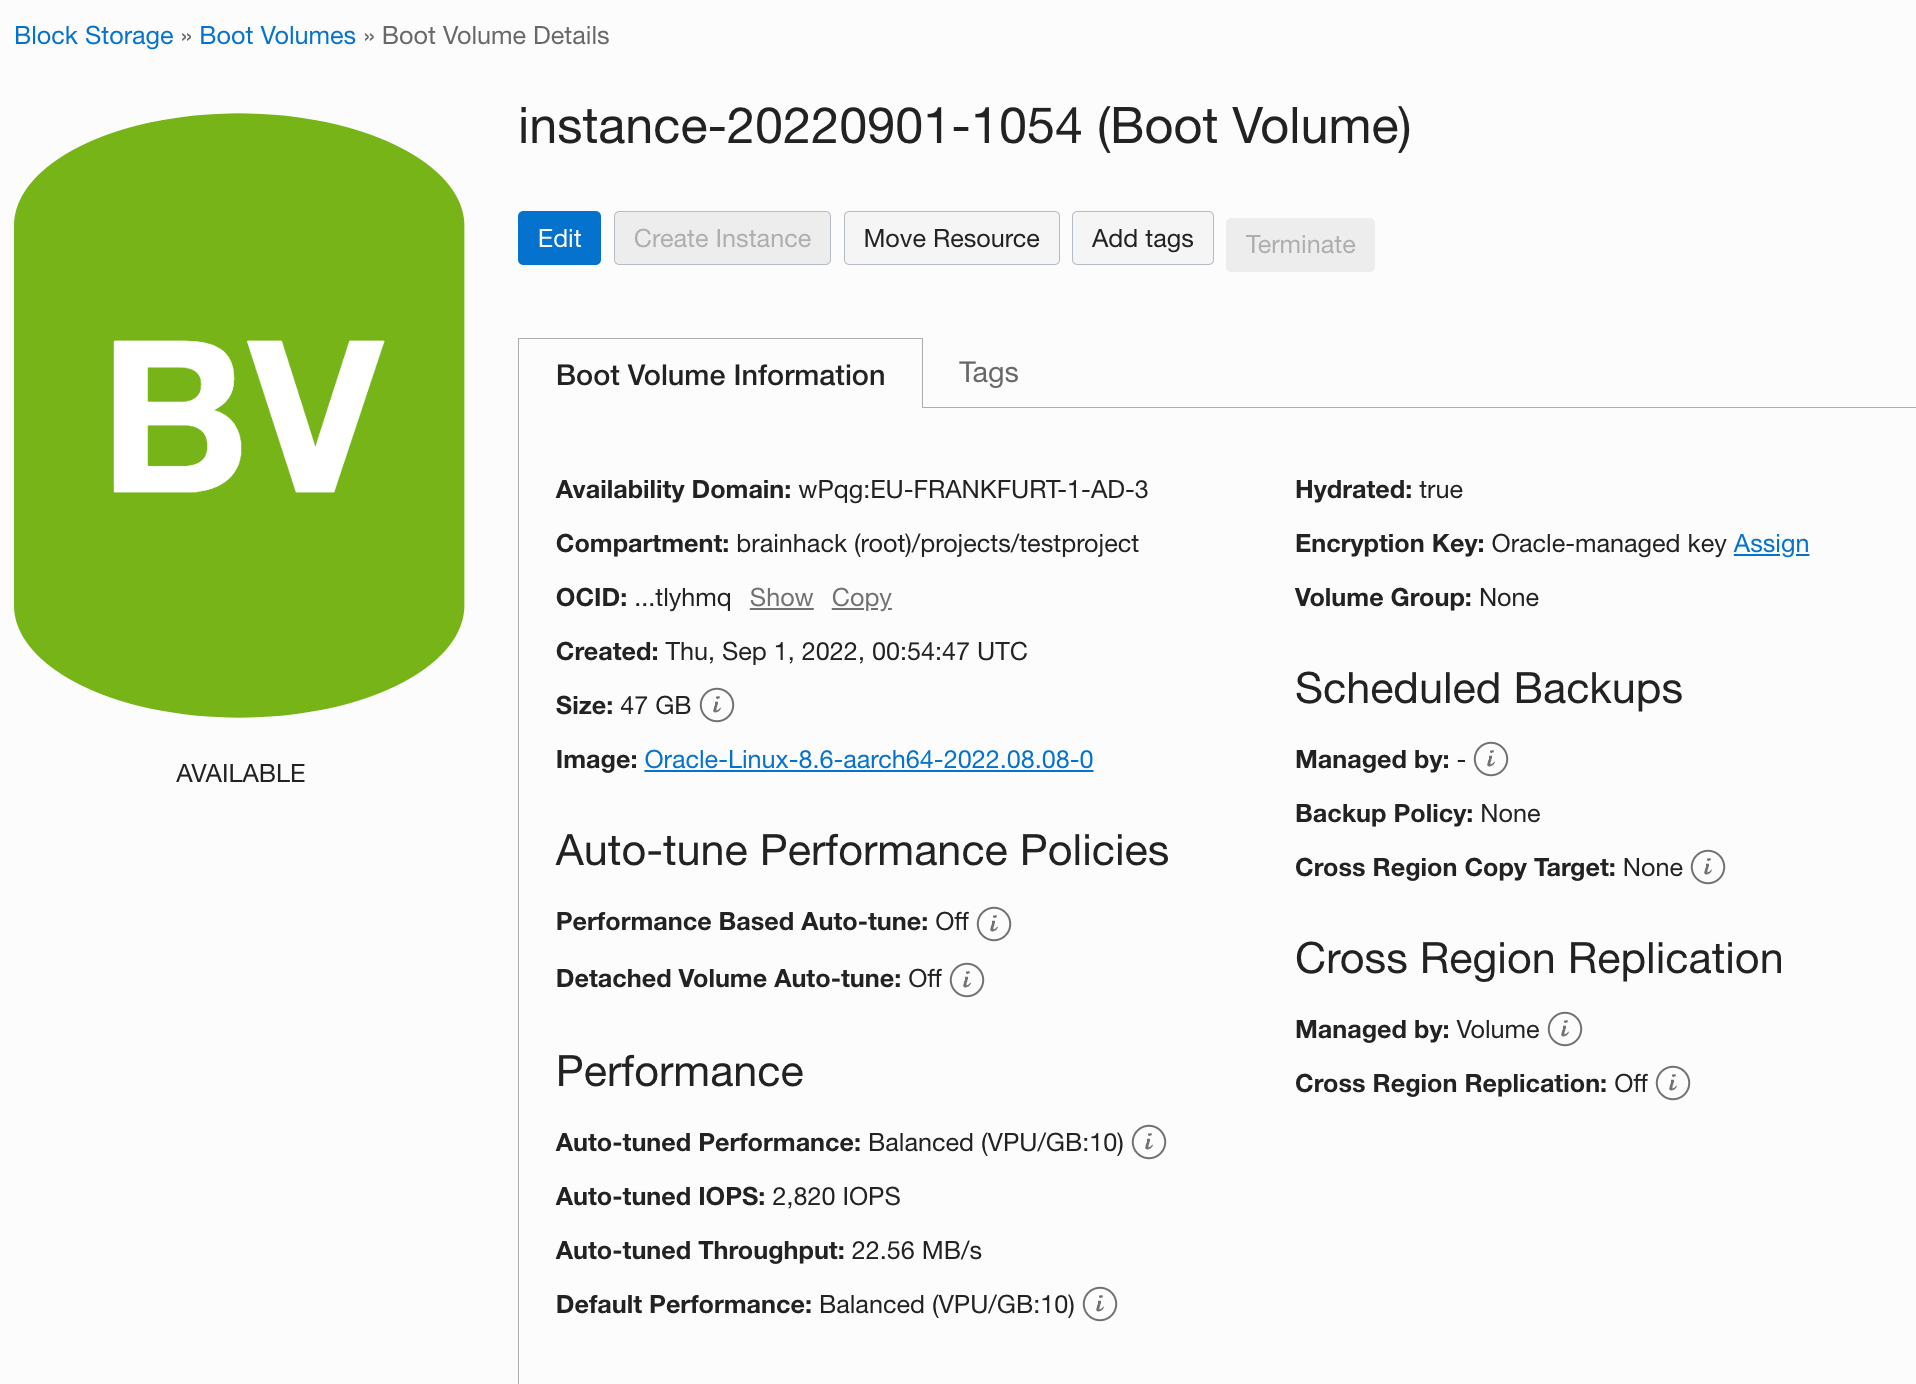
If you want to increase the disk space beyond the size that you initially set you need to first change the disk size in OCI. You can do this while the instance is running! Go to the instance and select Boot volume from the menu on the left:
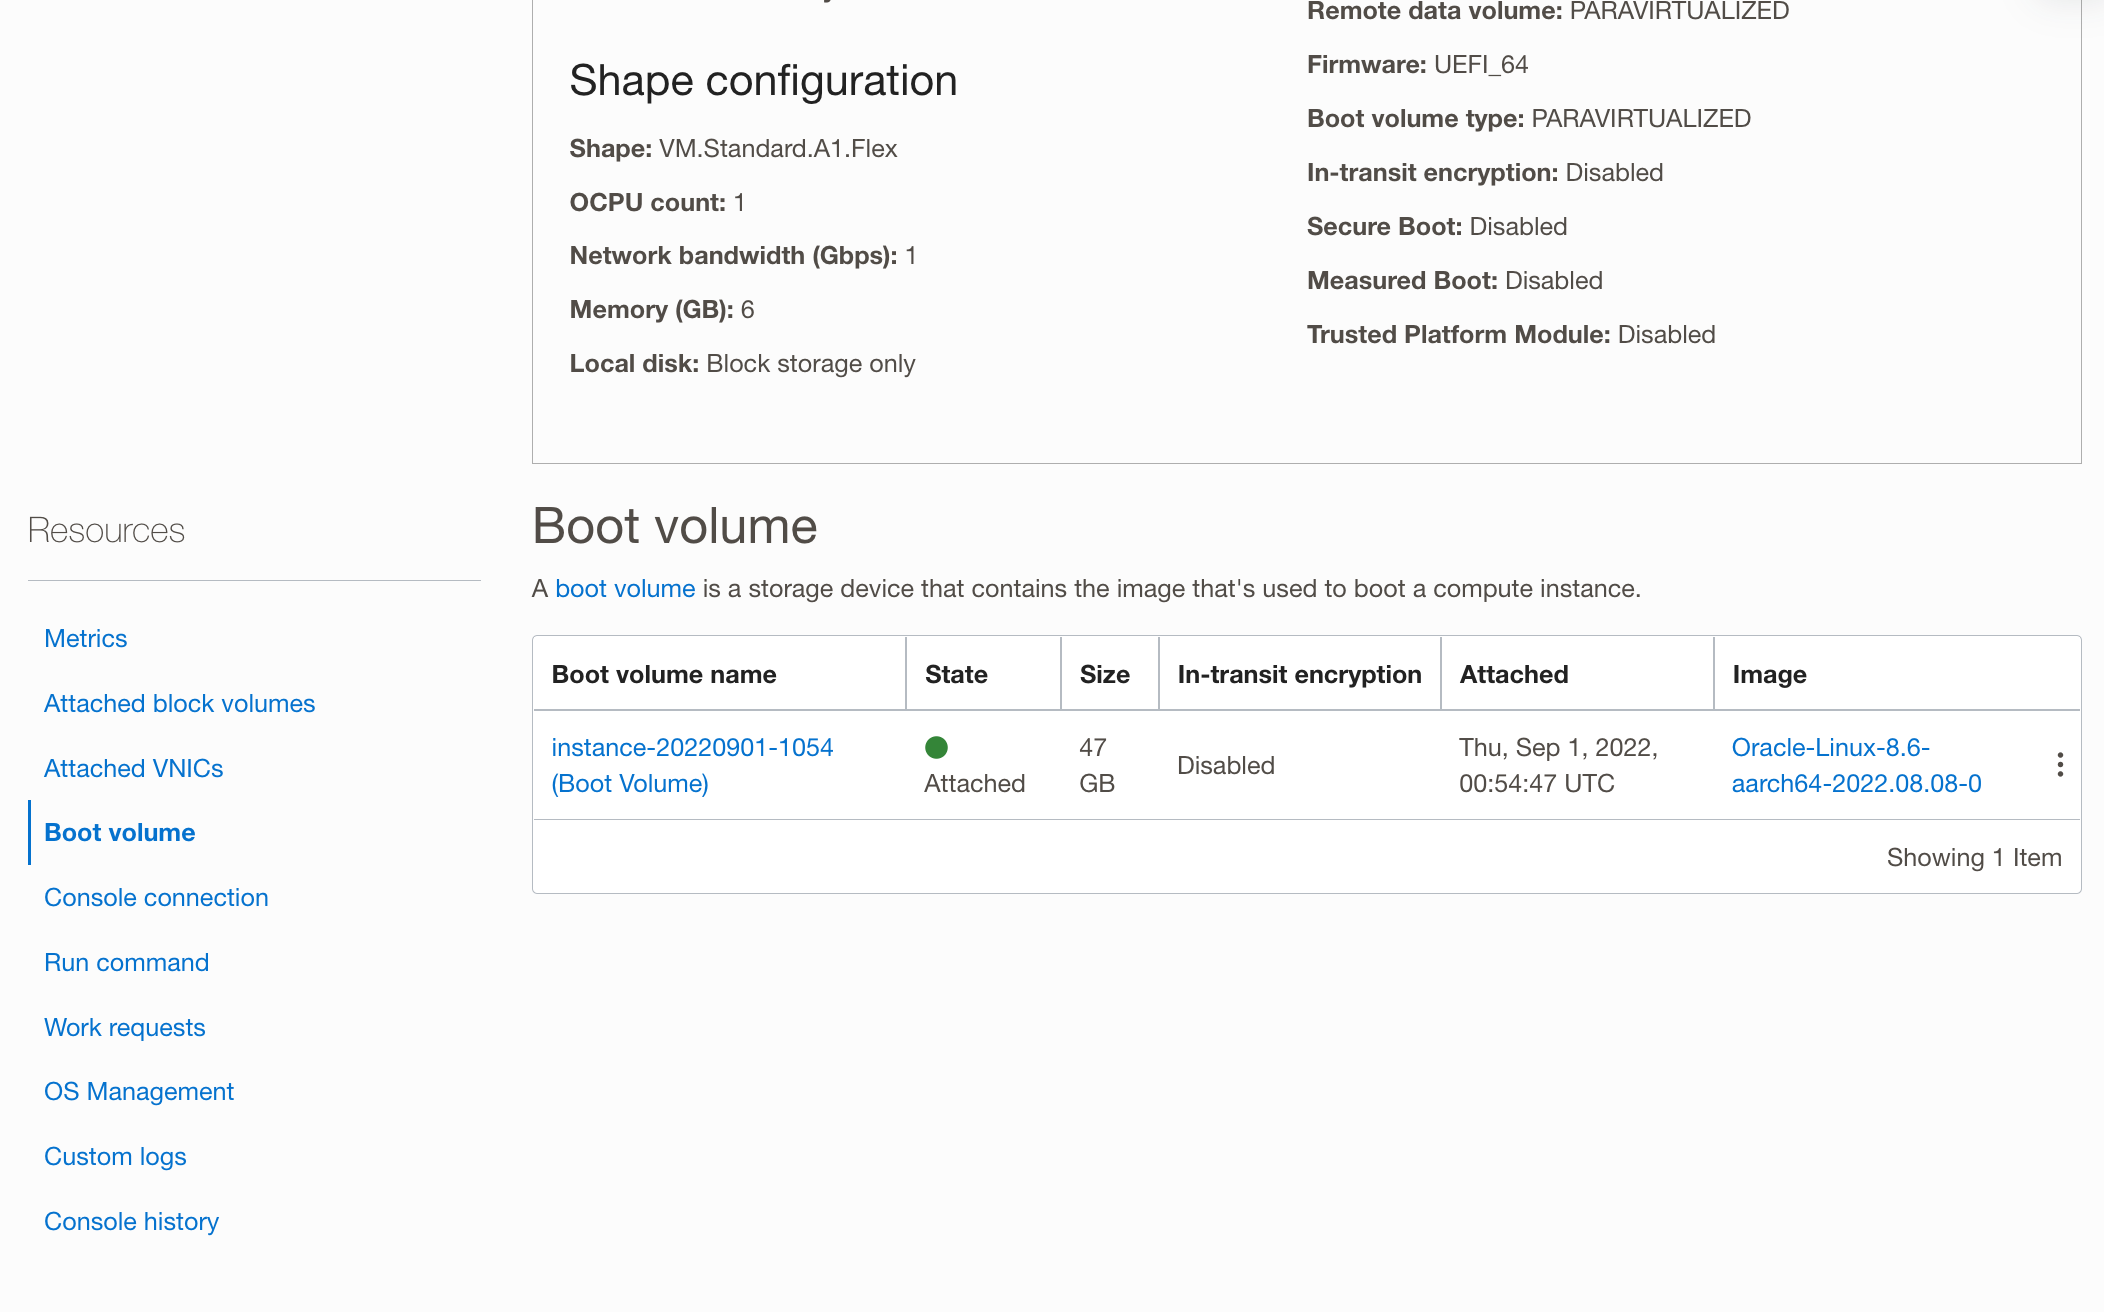
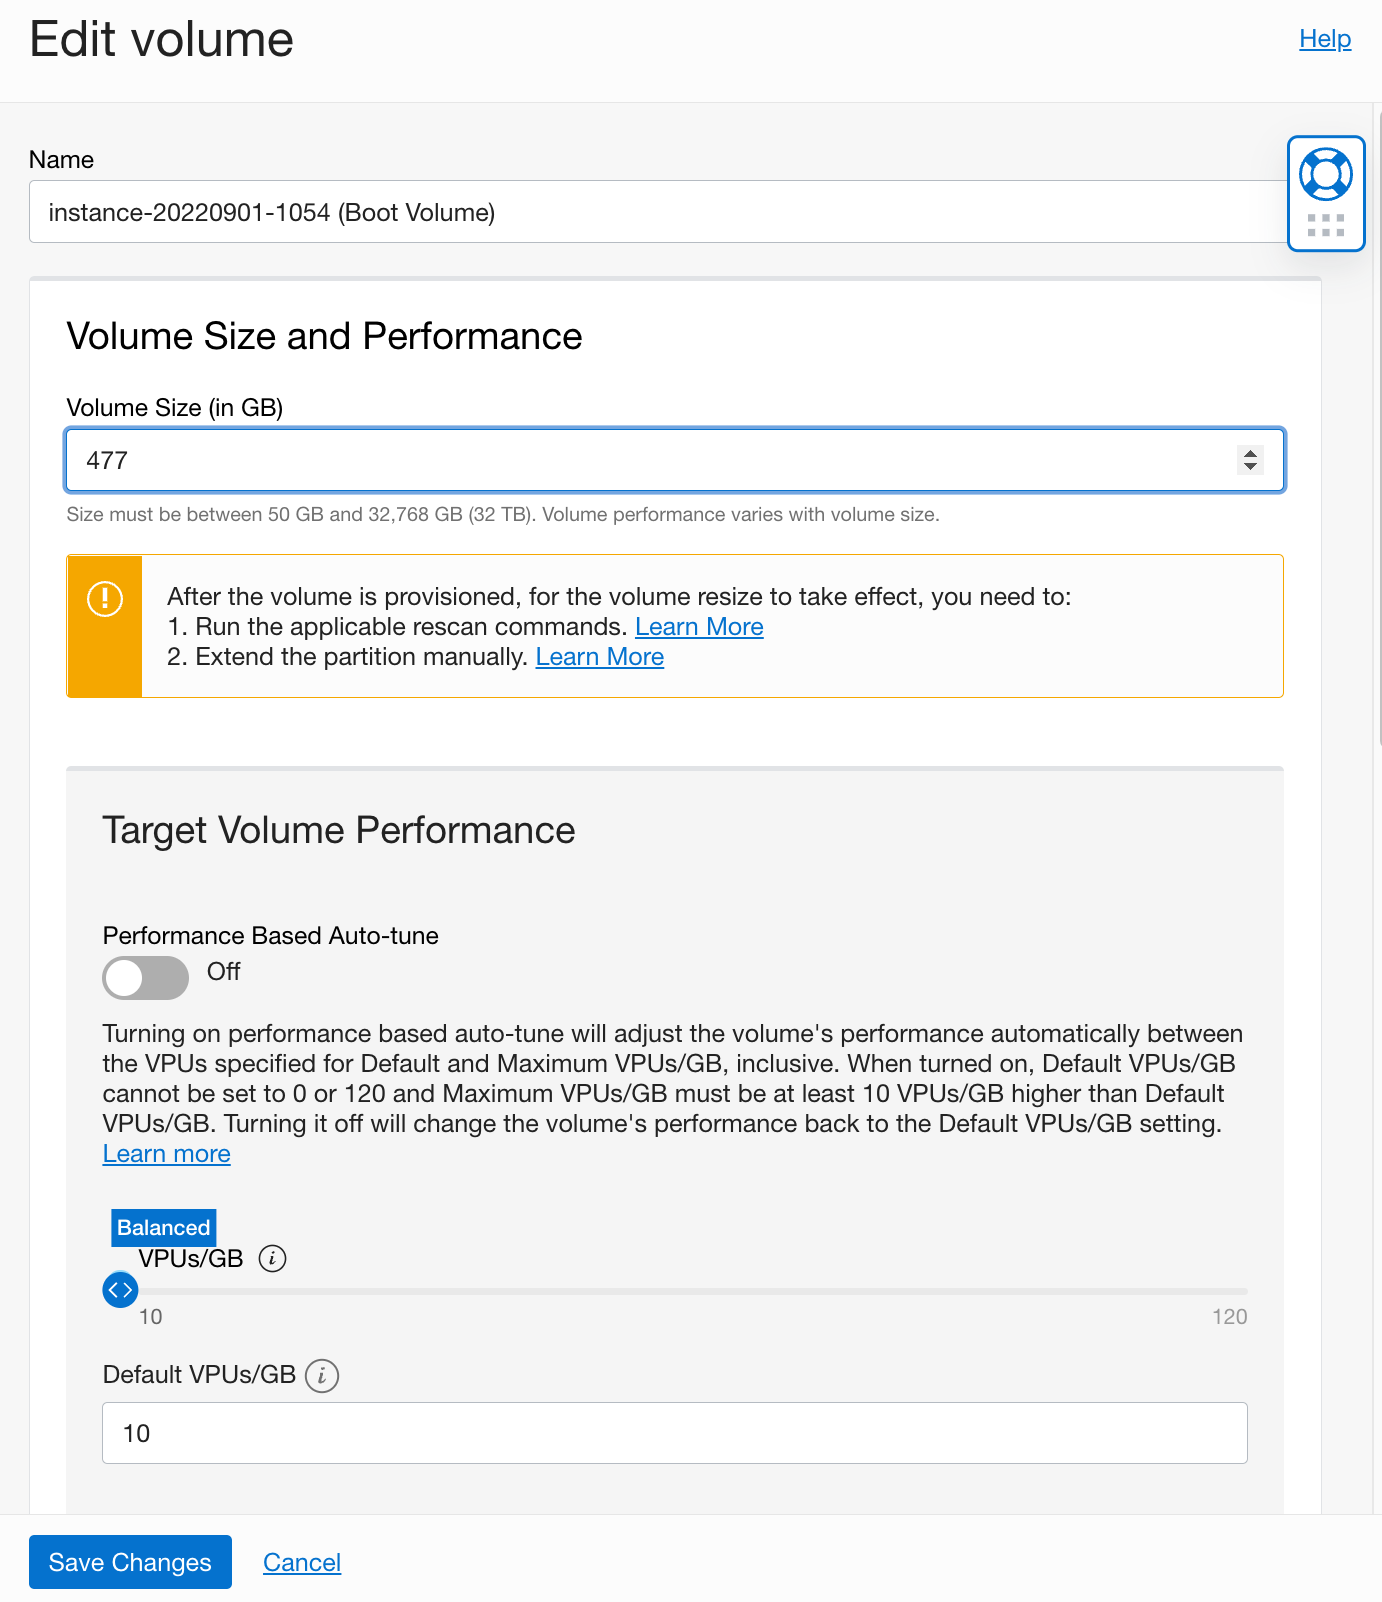
Then click on the boot volume name and click the Edit button:
Now set the desired size and click Save Changes:
Then login to the instance and expand the disk again to the new size:
sudo dd iflag=direct if=/dev/oracleoci/oraclevda of=/dev/null count=1
echo "1" | sudo tee /sys/class/block/`readlink /dev/oracleoci/oraclevda | cut -d'/' -f 2`/device/rescan
sudo /usr/libexec/oci-growfs -y
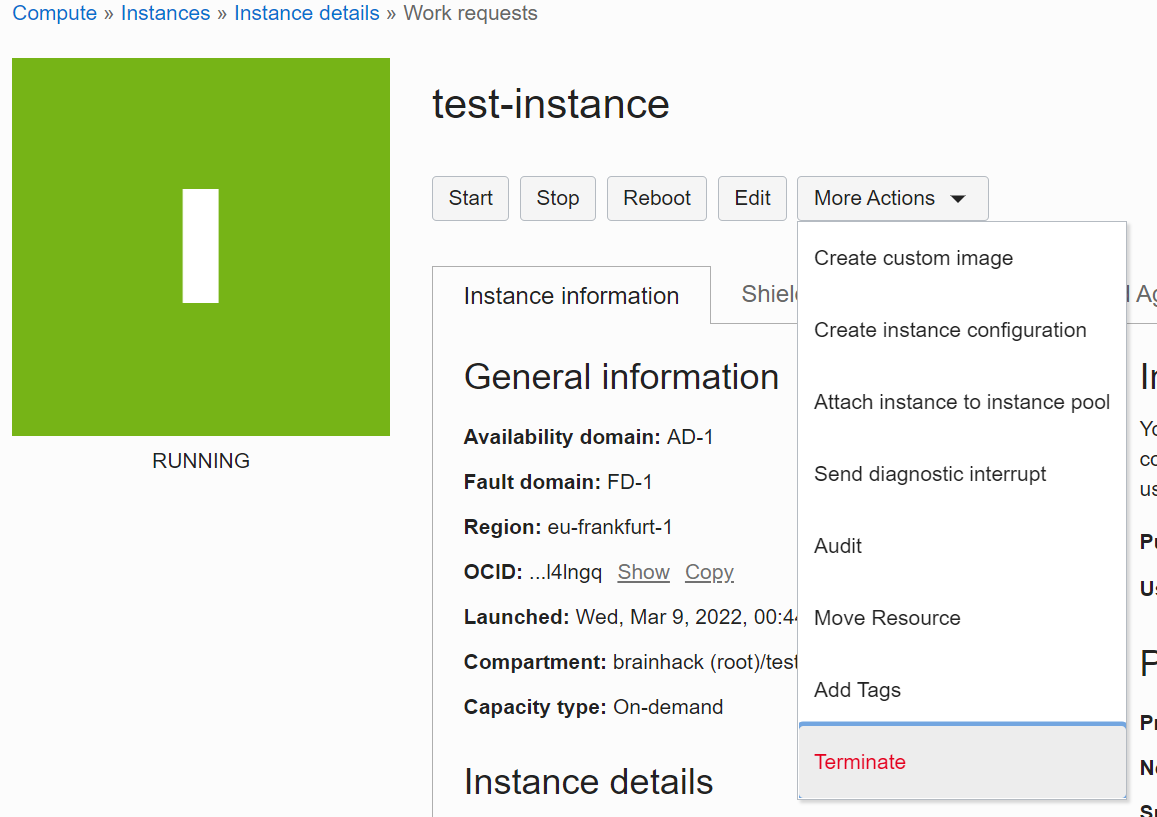
Terminate the instance
If you don’t need the machine anymore, you can Stop it (you don’t pay for the compute anymore, but the disk stays and you can start it back up later) or Terminate it (everything gets removed, including the boot volume if you want to):
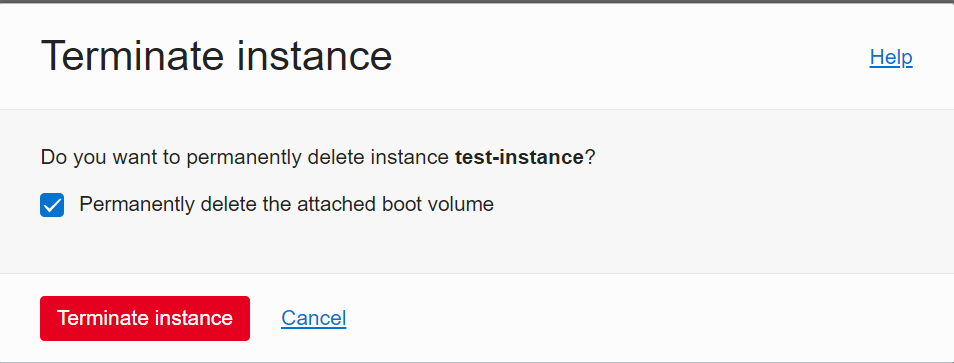
To cleanup the storage as well, you can select
Permanently delete the attached boot volume and click Terminate Instance.
If you aim to update the version of the Python that comes as default with VM or install environment you could install Miniconda by following below commands:
curl -o /tmp/miniconda.sh https://repo.anaconda.com/miniconda/Miniconda3-latest-Linux-x86_64.sh;
bash /tmp/miniconda.sh -b;
miniconda3/bin/conda init
this installation will give you all the necessary packages to start with building your own environment and project.